How to create a form?
The steps to create a form are as follows:
-
Create a form
-
Add form fields
-
Set the field properties
-
Save and check the results
-
Edit the form
1. Create a form
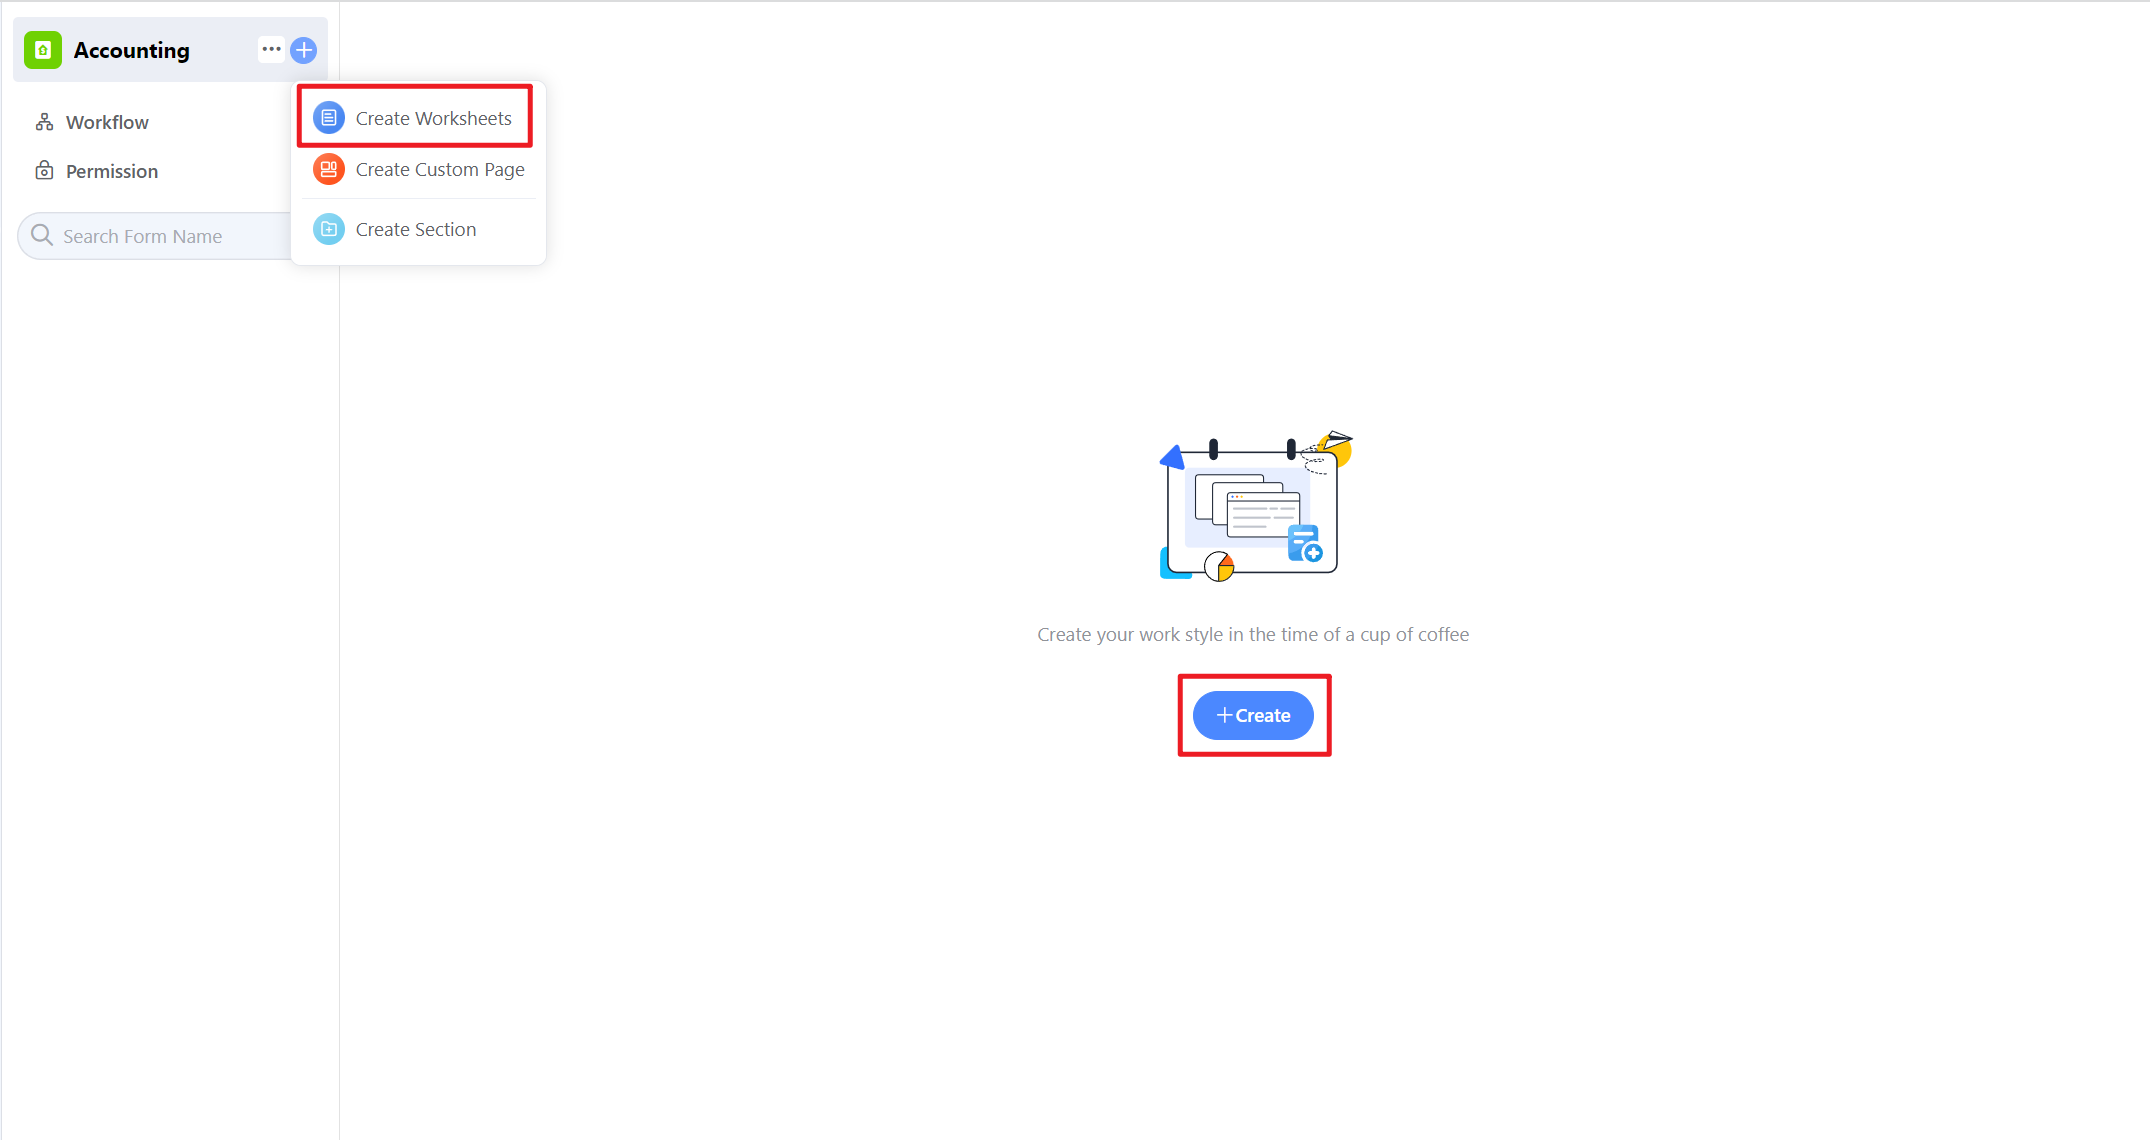
You can create a form through the two entrances in the image below.
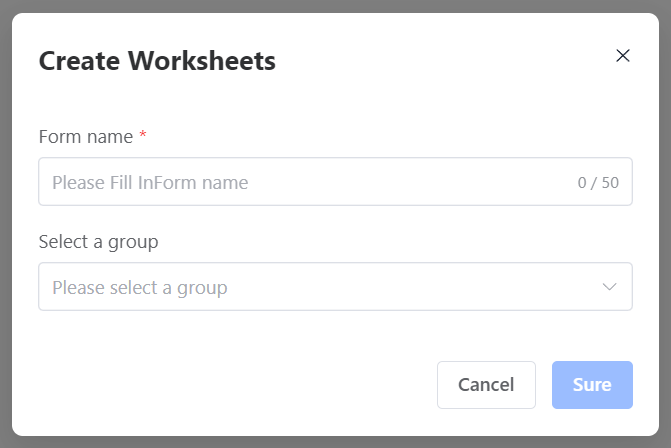
To create a form, you need to fill in the form name. If you have created a group before, you can also set the group and move the form into the group later.
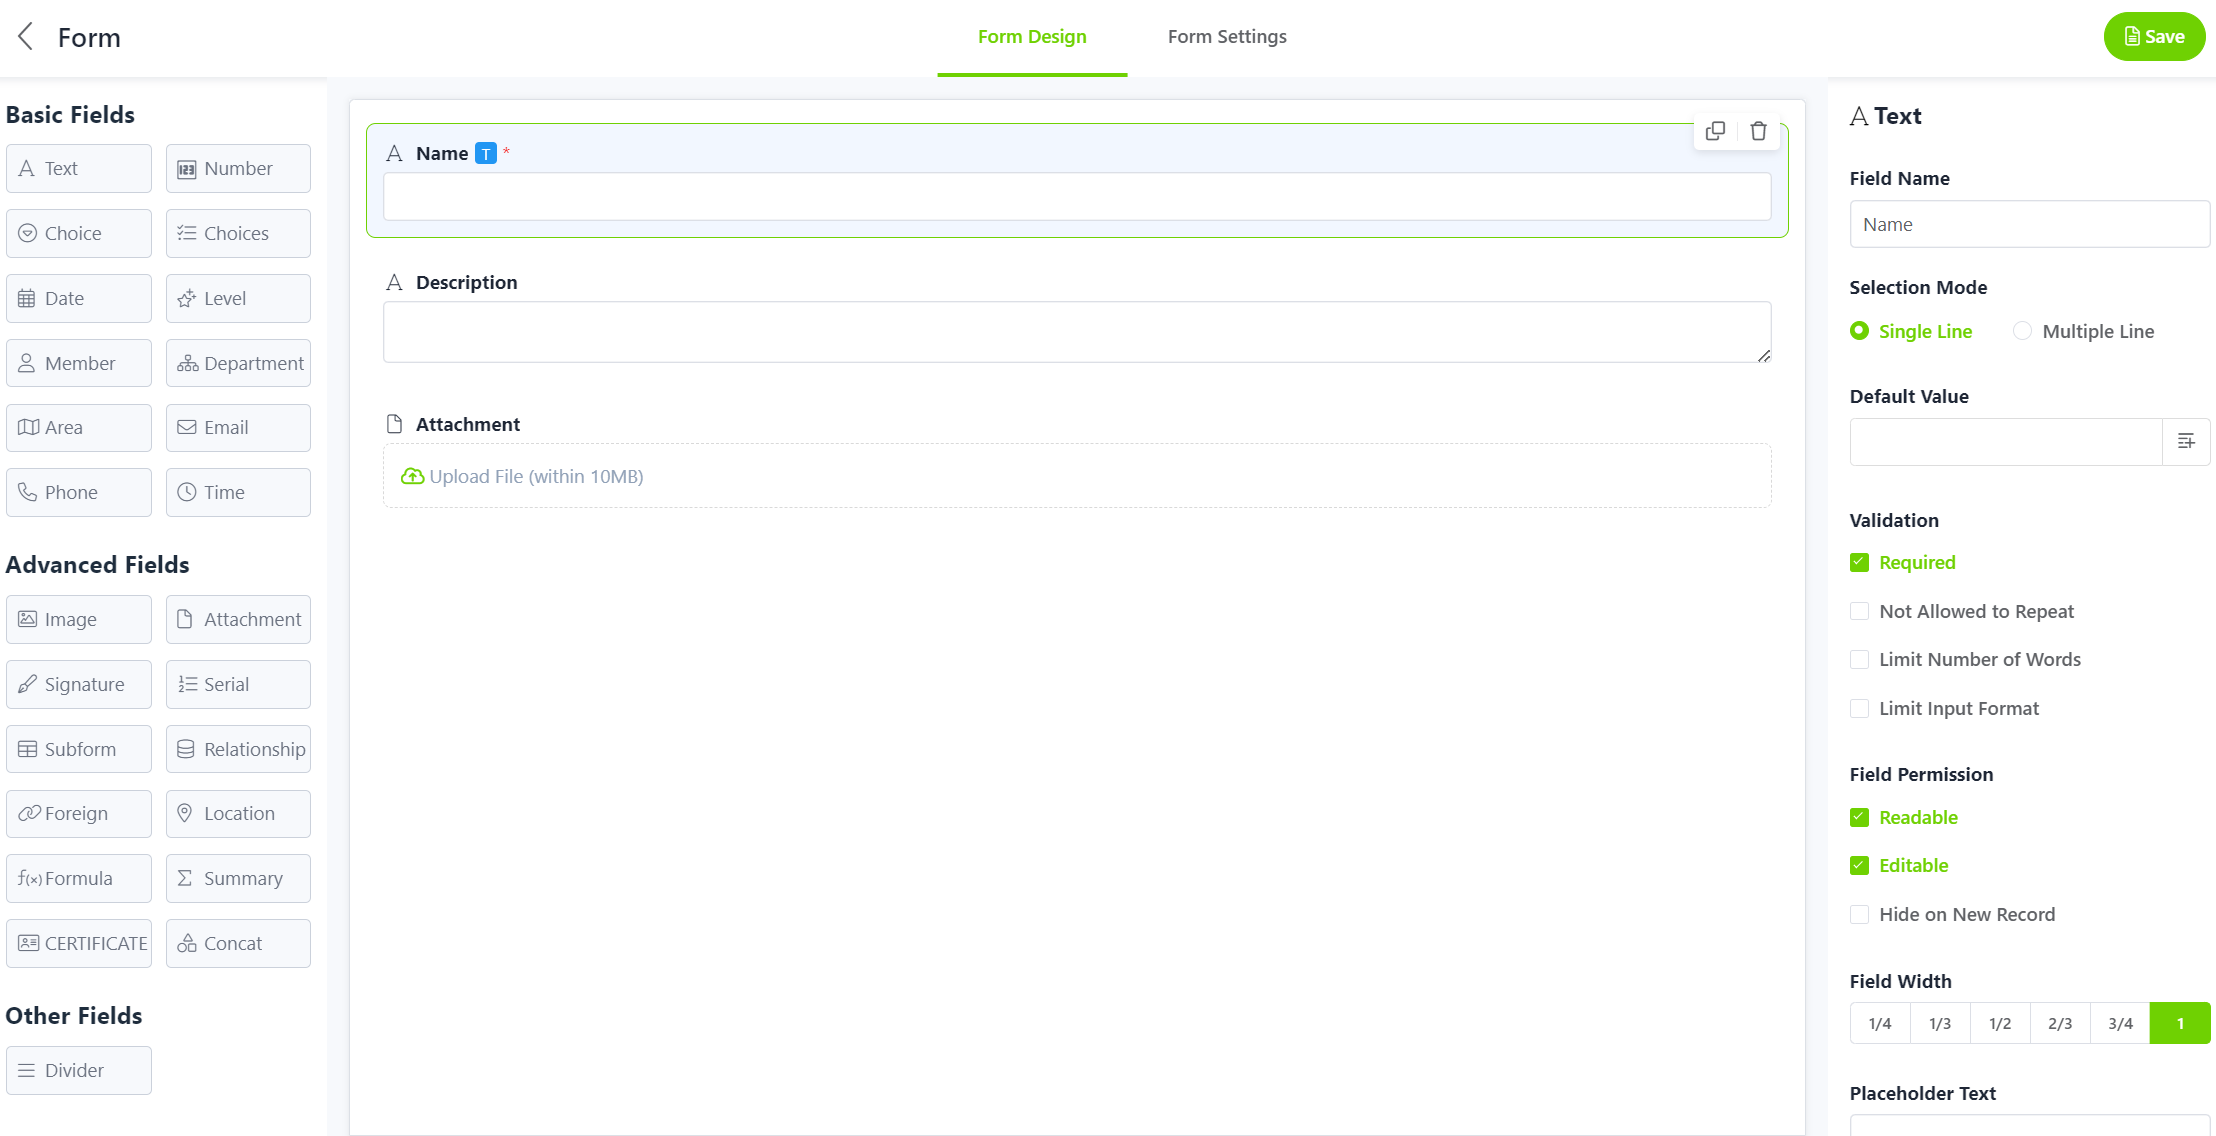
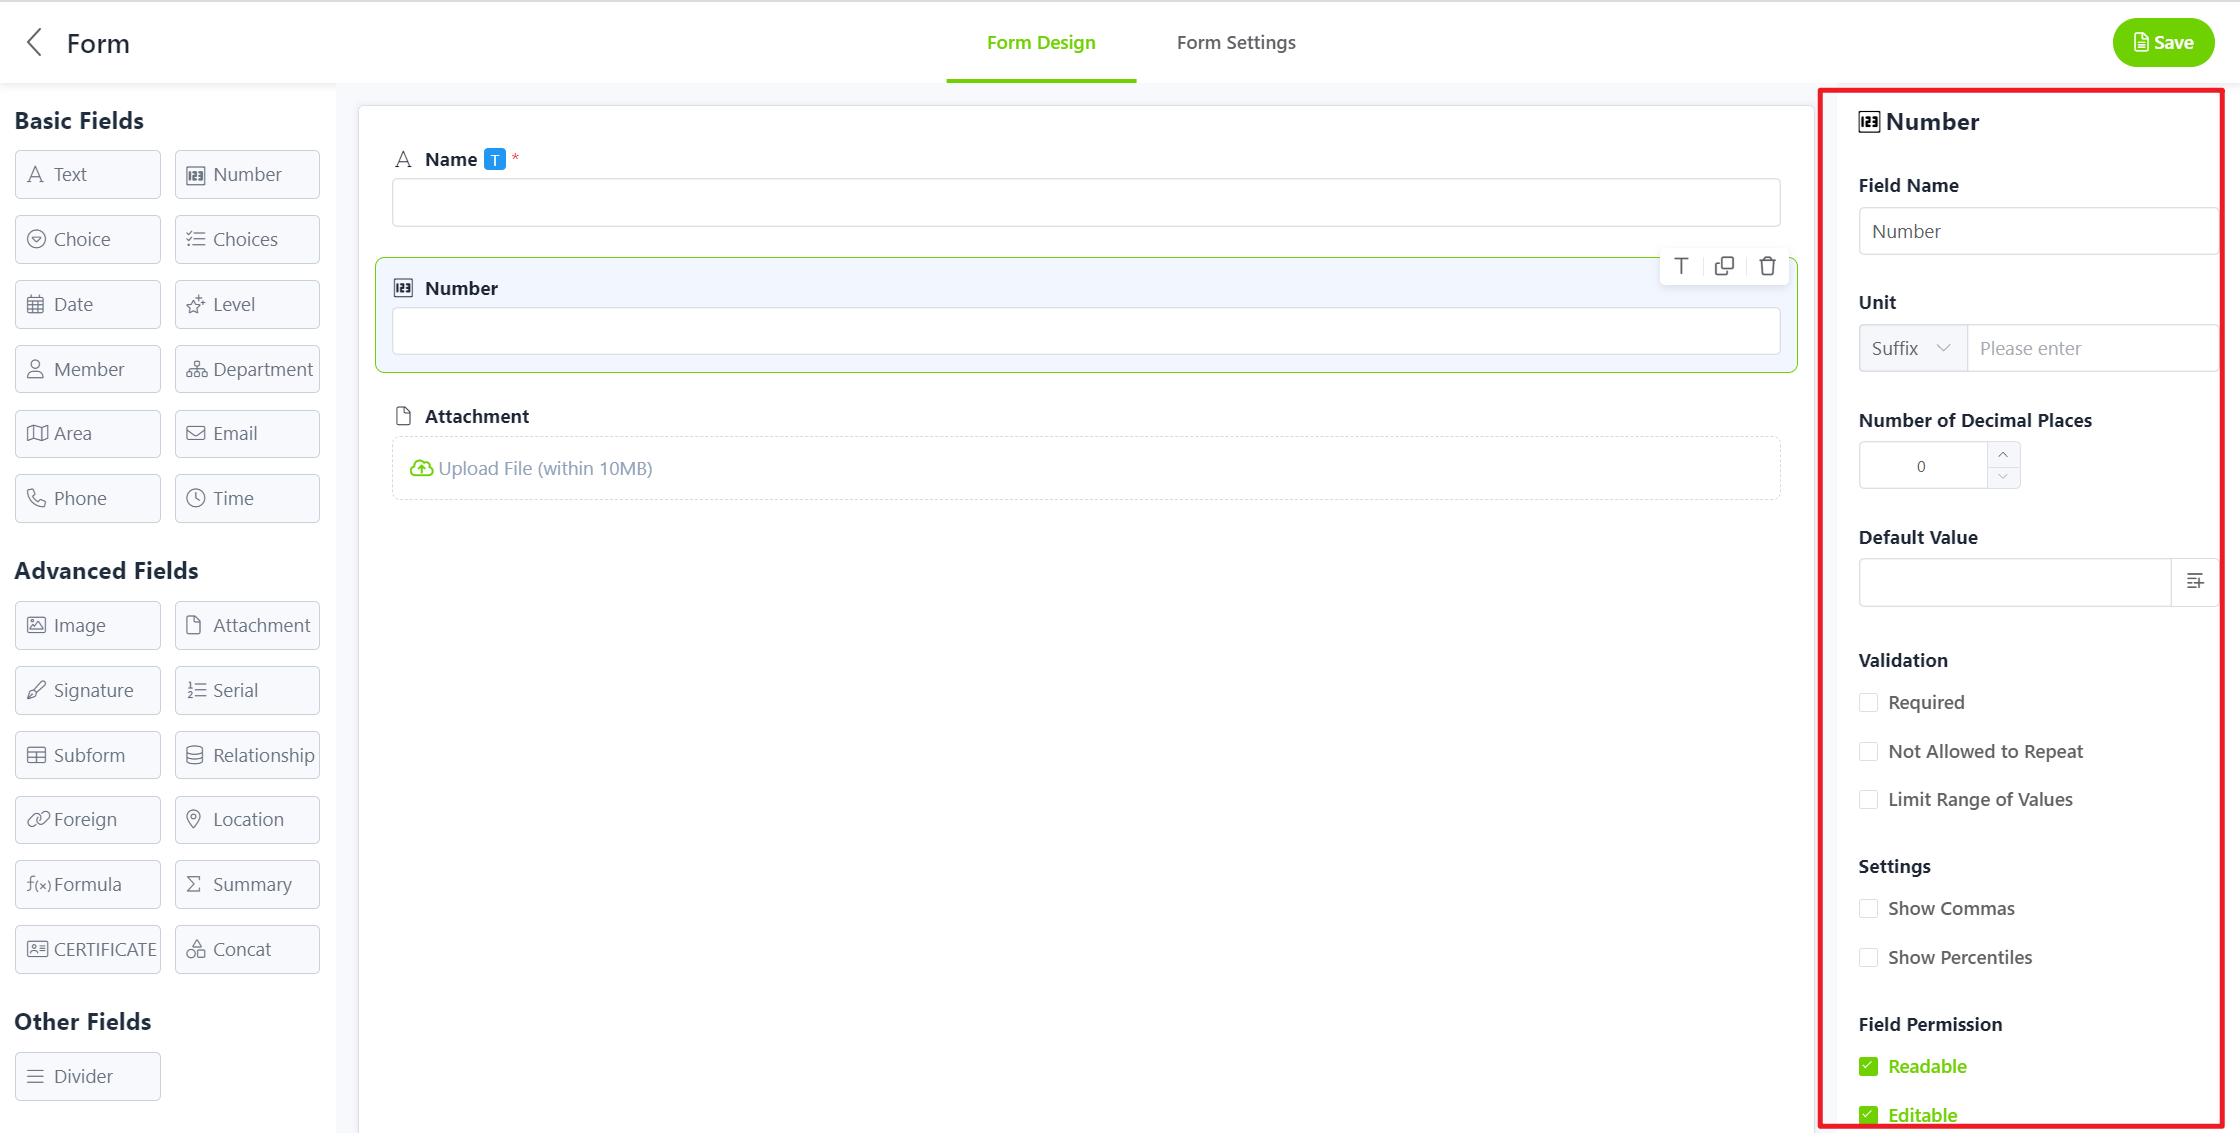
Entering the Form Design page, we can see three areas, the left is the field control, the middle is the form design layout, and the right is the field property settings:
2. Add form fields
Form fields are like columns in an Excel workbook. The difference is that it allows users to store rich content in each column.
2.1 Add fields
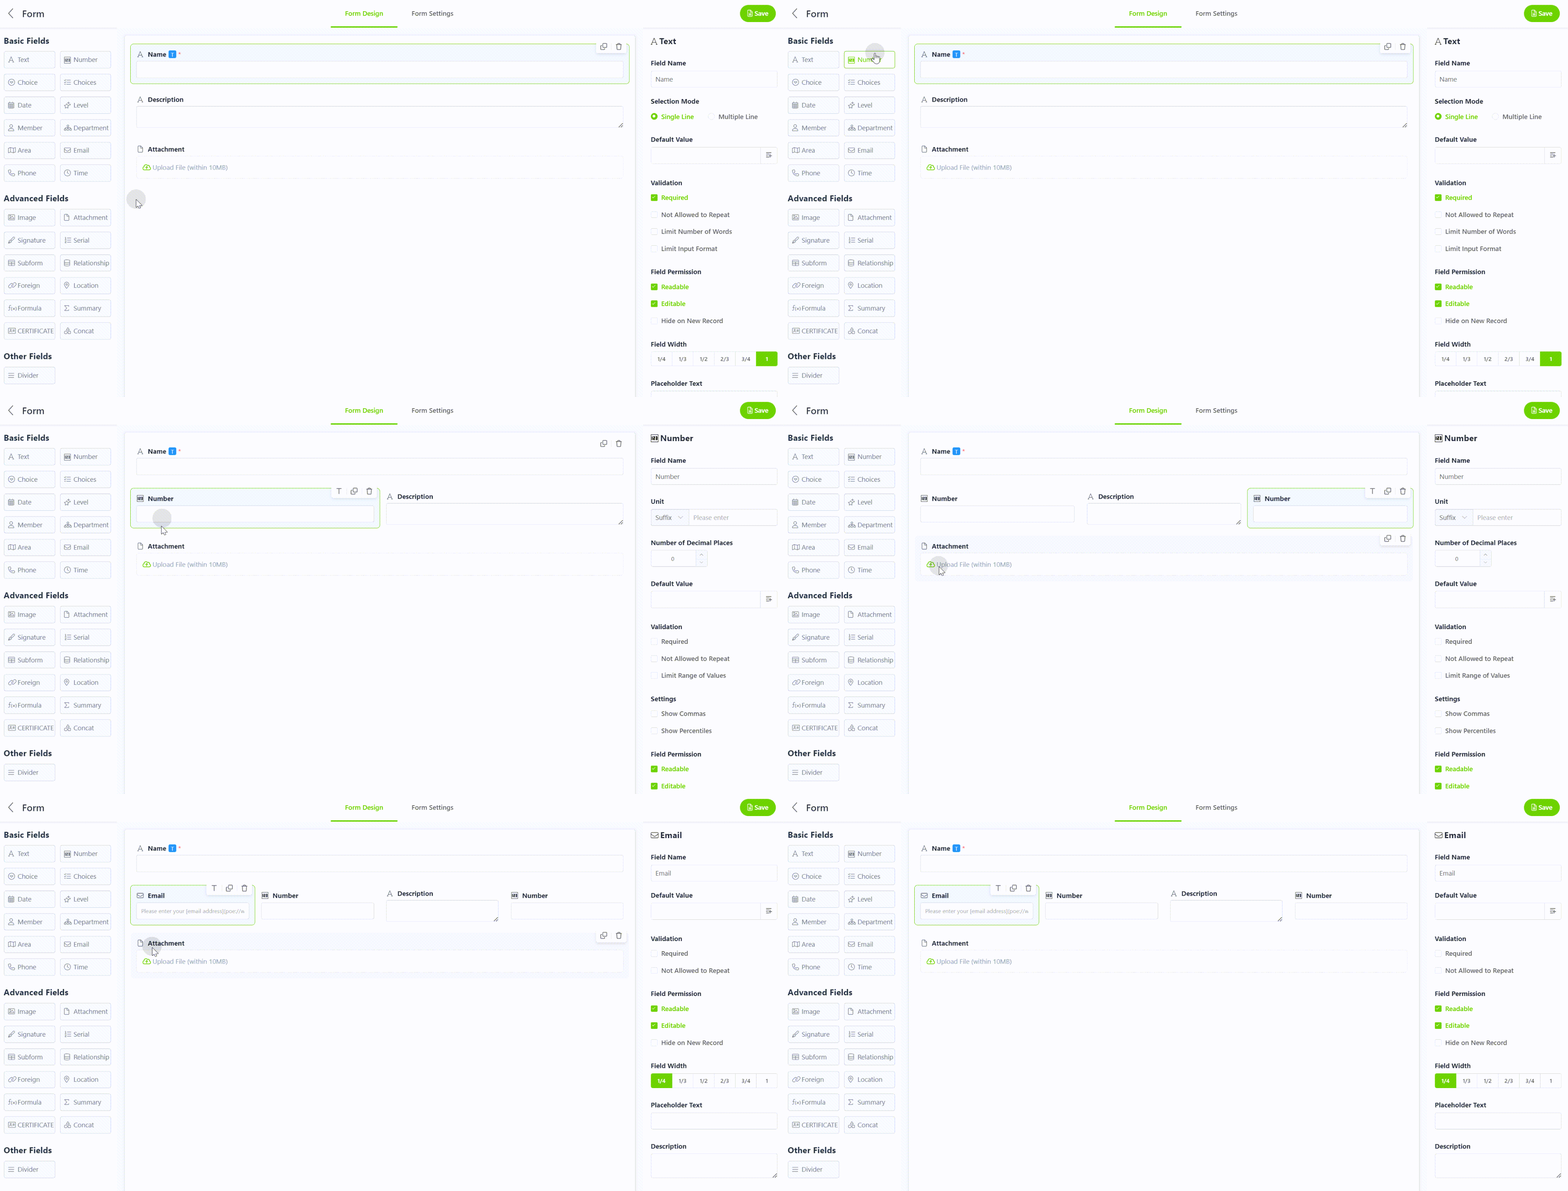
You can select the desired field in the field area on the left and click or drag it to the form design area in the middle of the page.
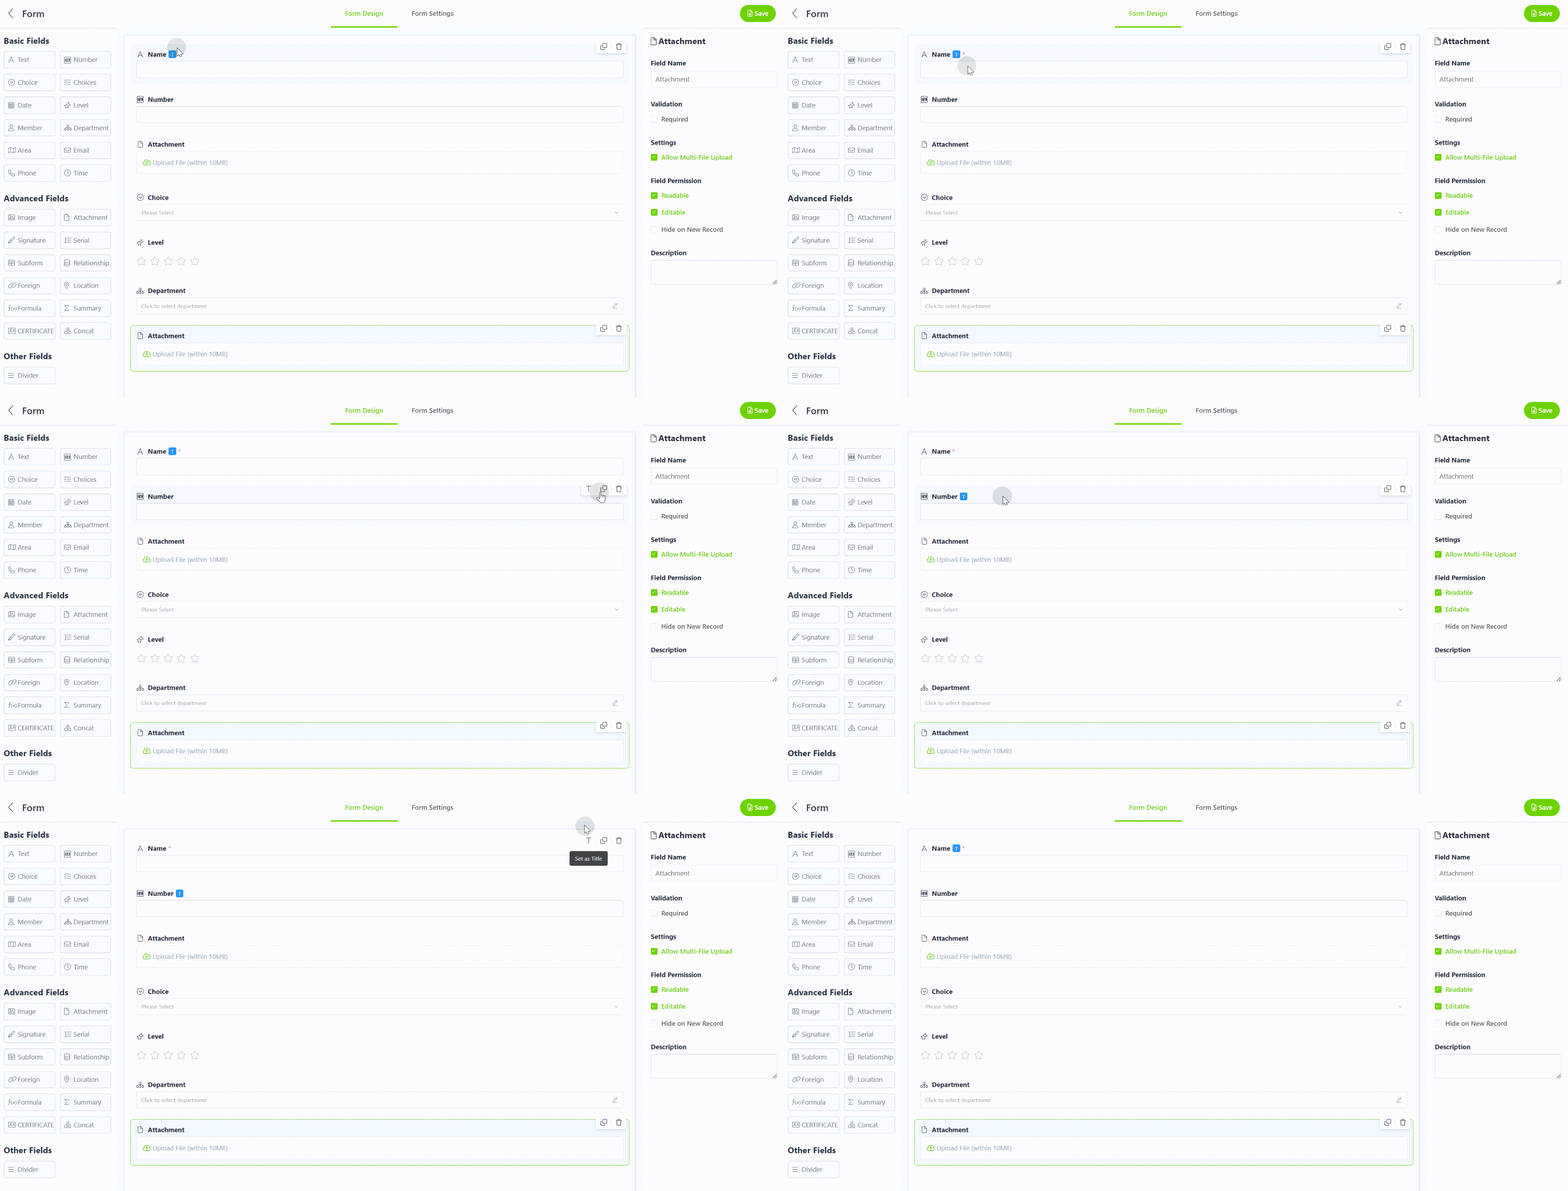
2.2 Title fields
The title field is for the most iconic field in the form. For example, the "order number" field should be the title field when you view the order record. Then when you see the "order number", you can quickly select and view related information.
When the mouse hovers over the field, you will see . When you click the icon T [Set as Title] operation button, you can set the field as the title field.
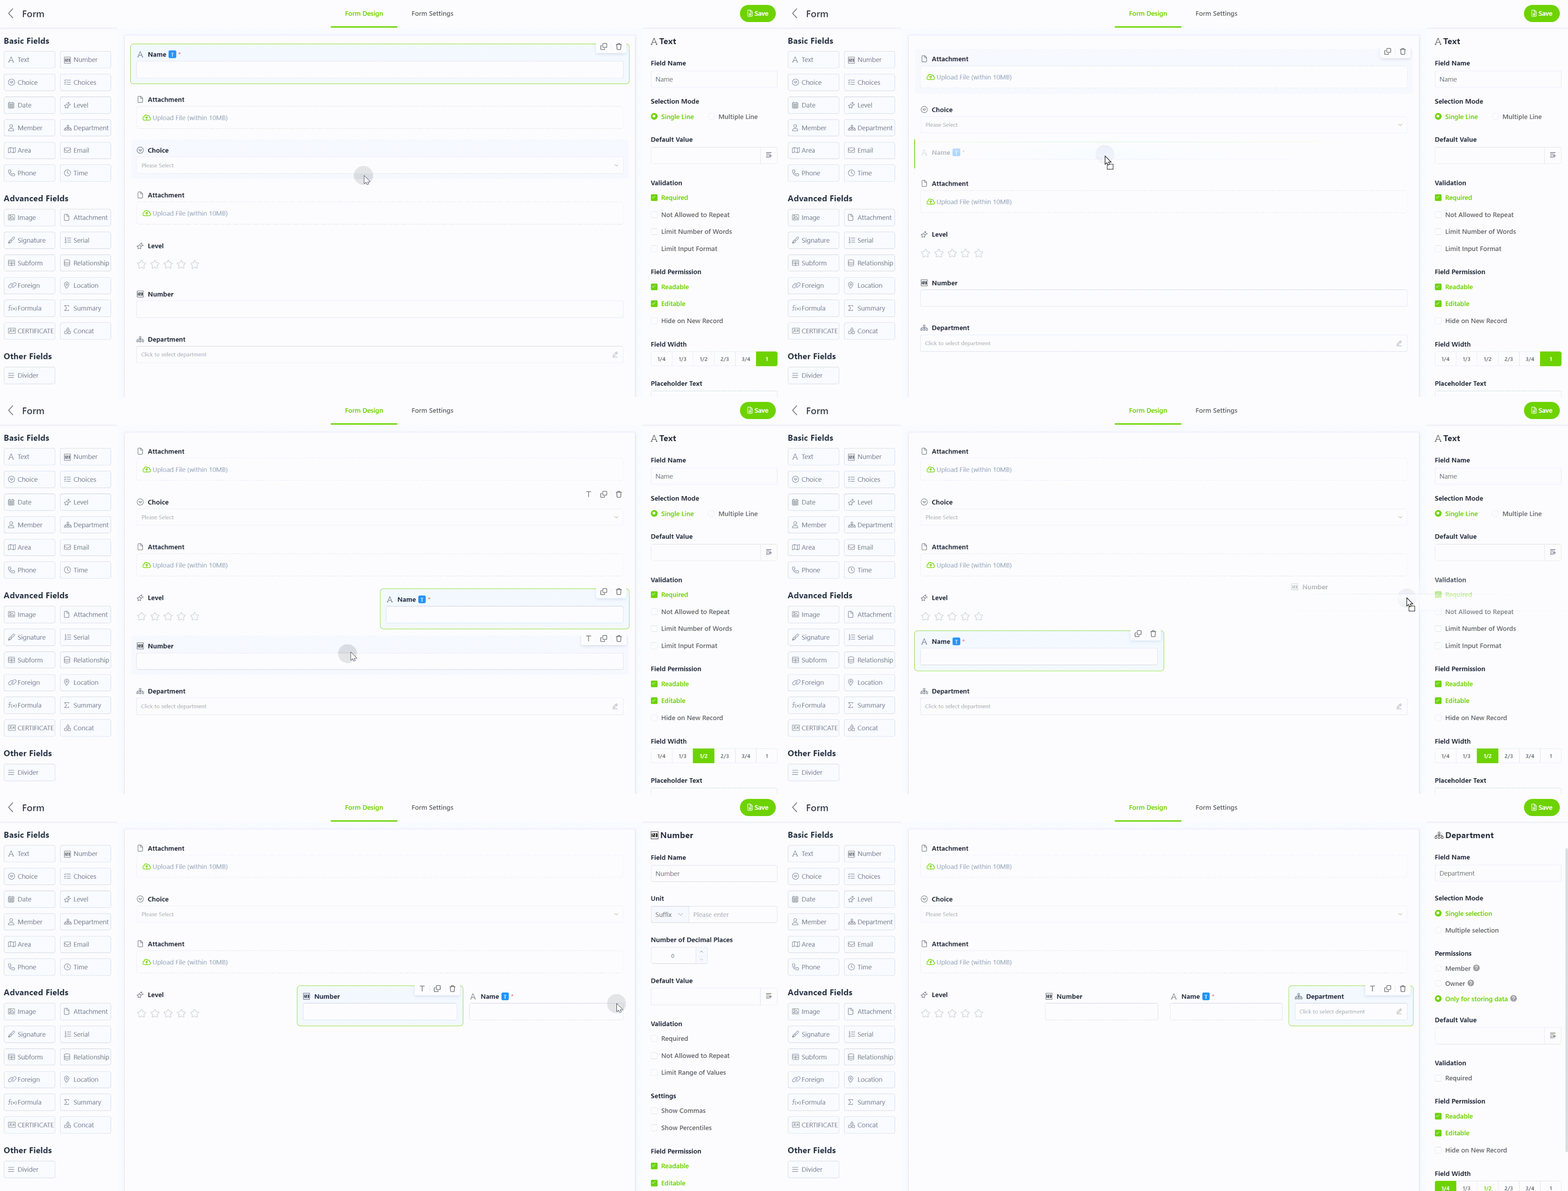
2.3 Adjust field position and layout
Click the field, press and hold the mouse, drag it to the desired position, and release it. There can be up to 4 fields in a row.
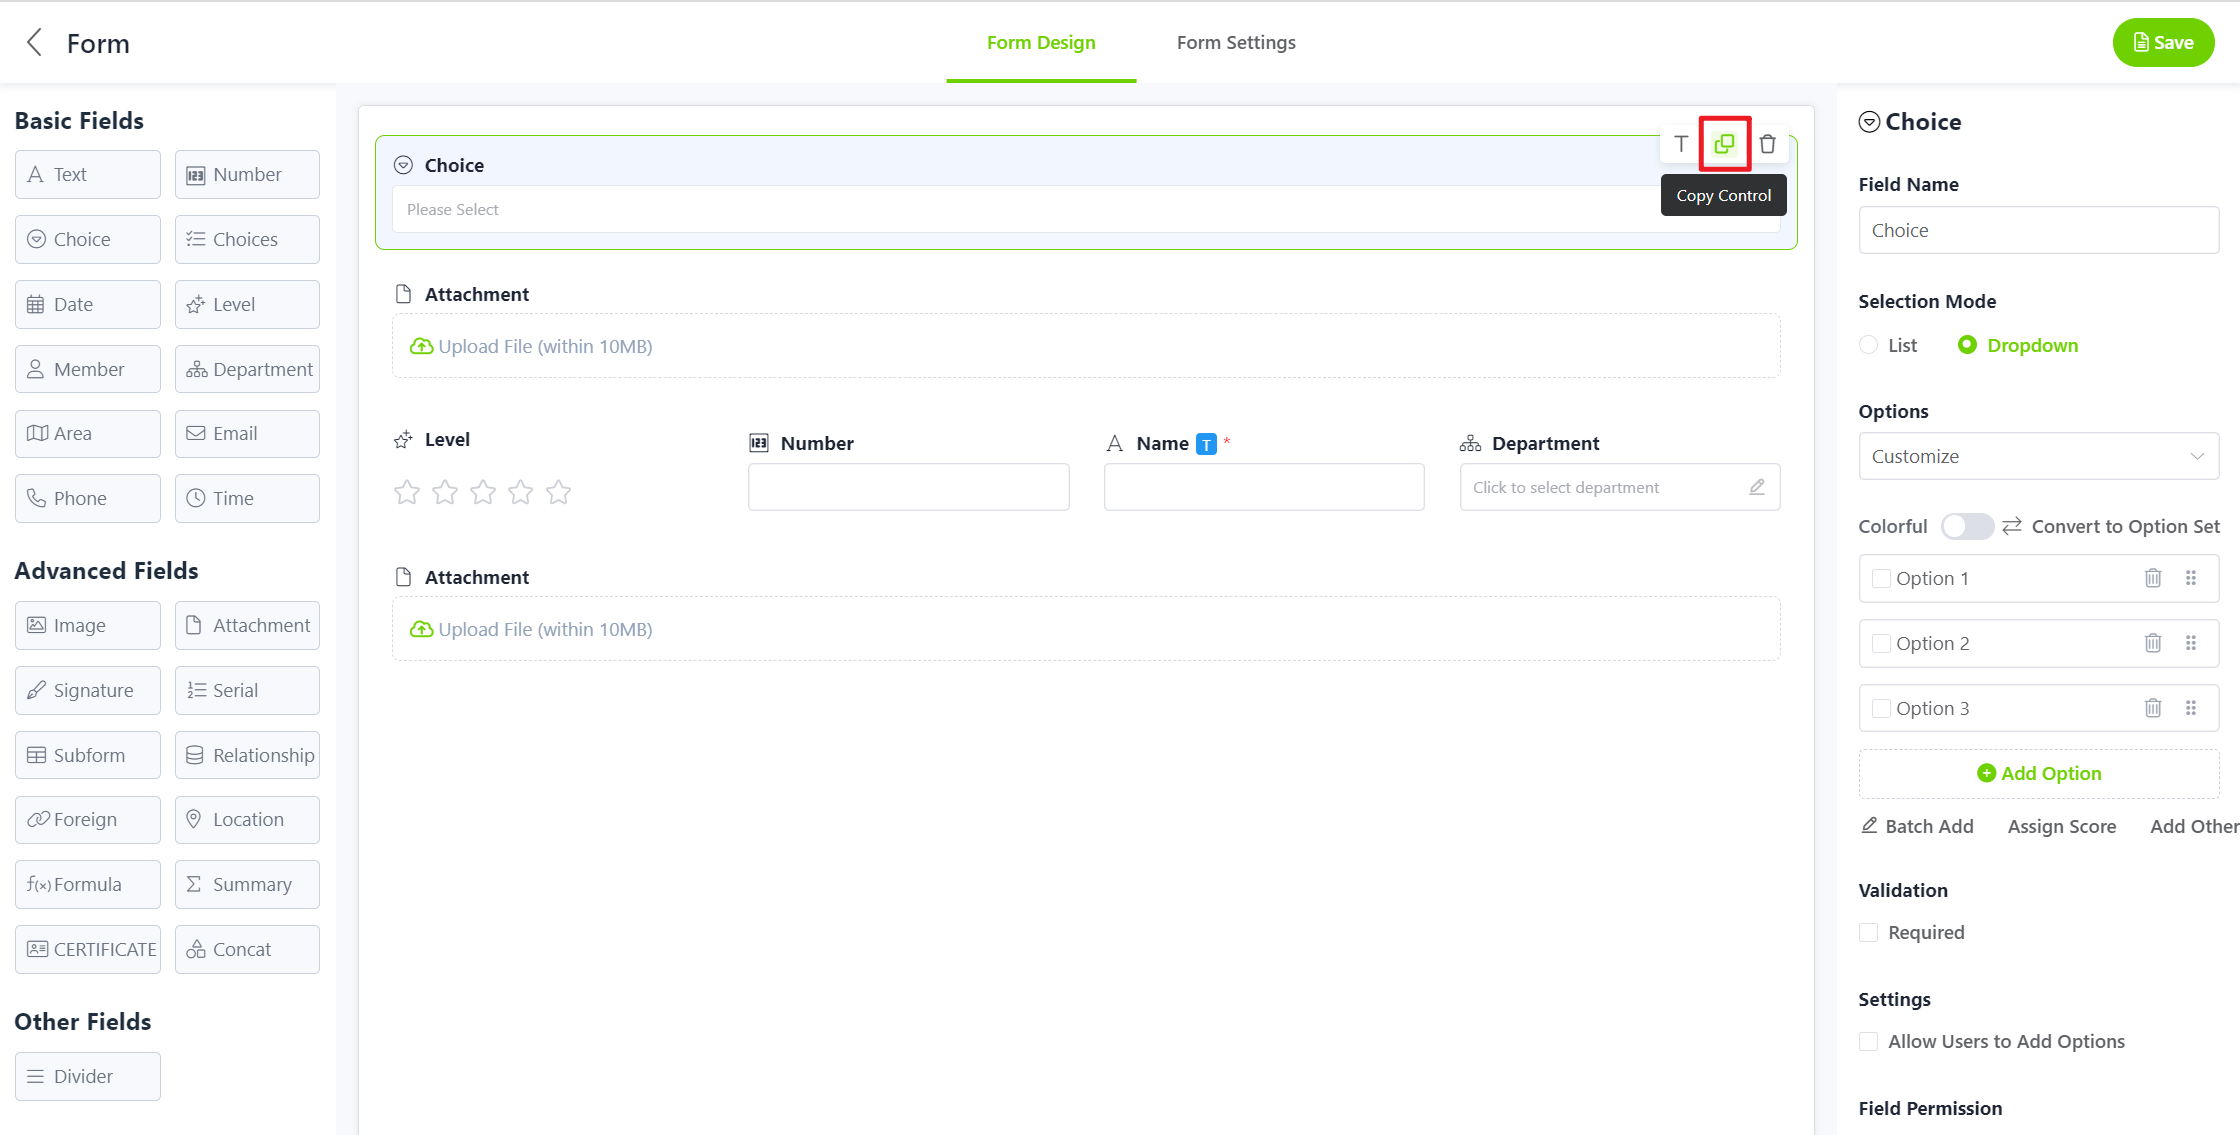
2.4 Copy fields
You can quickly create fields through the Copy Control if you need to create repeated fields. When the mouse hovers over the field, the [Copy Control] button will be displayed, and the field can be copied.
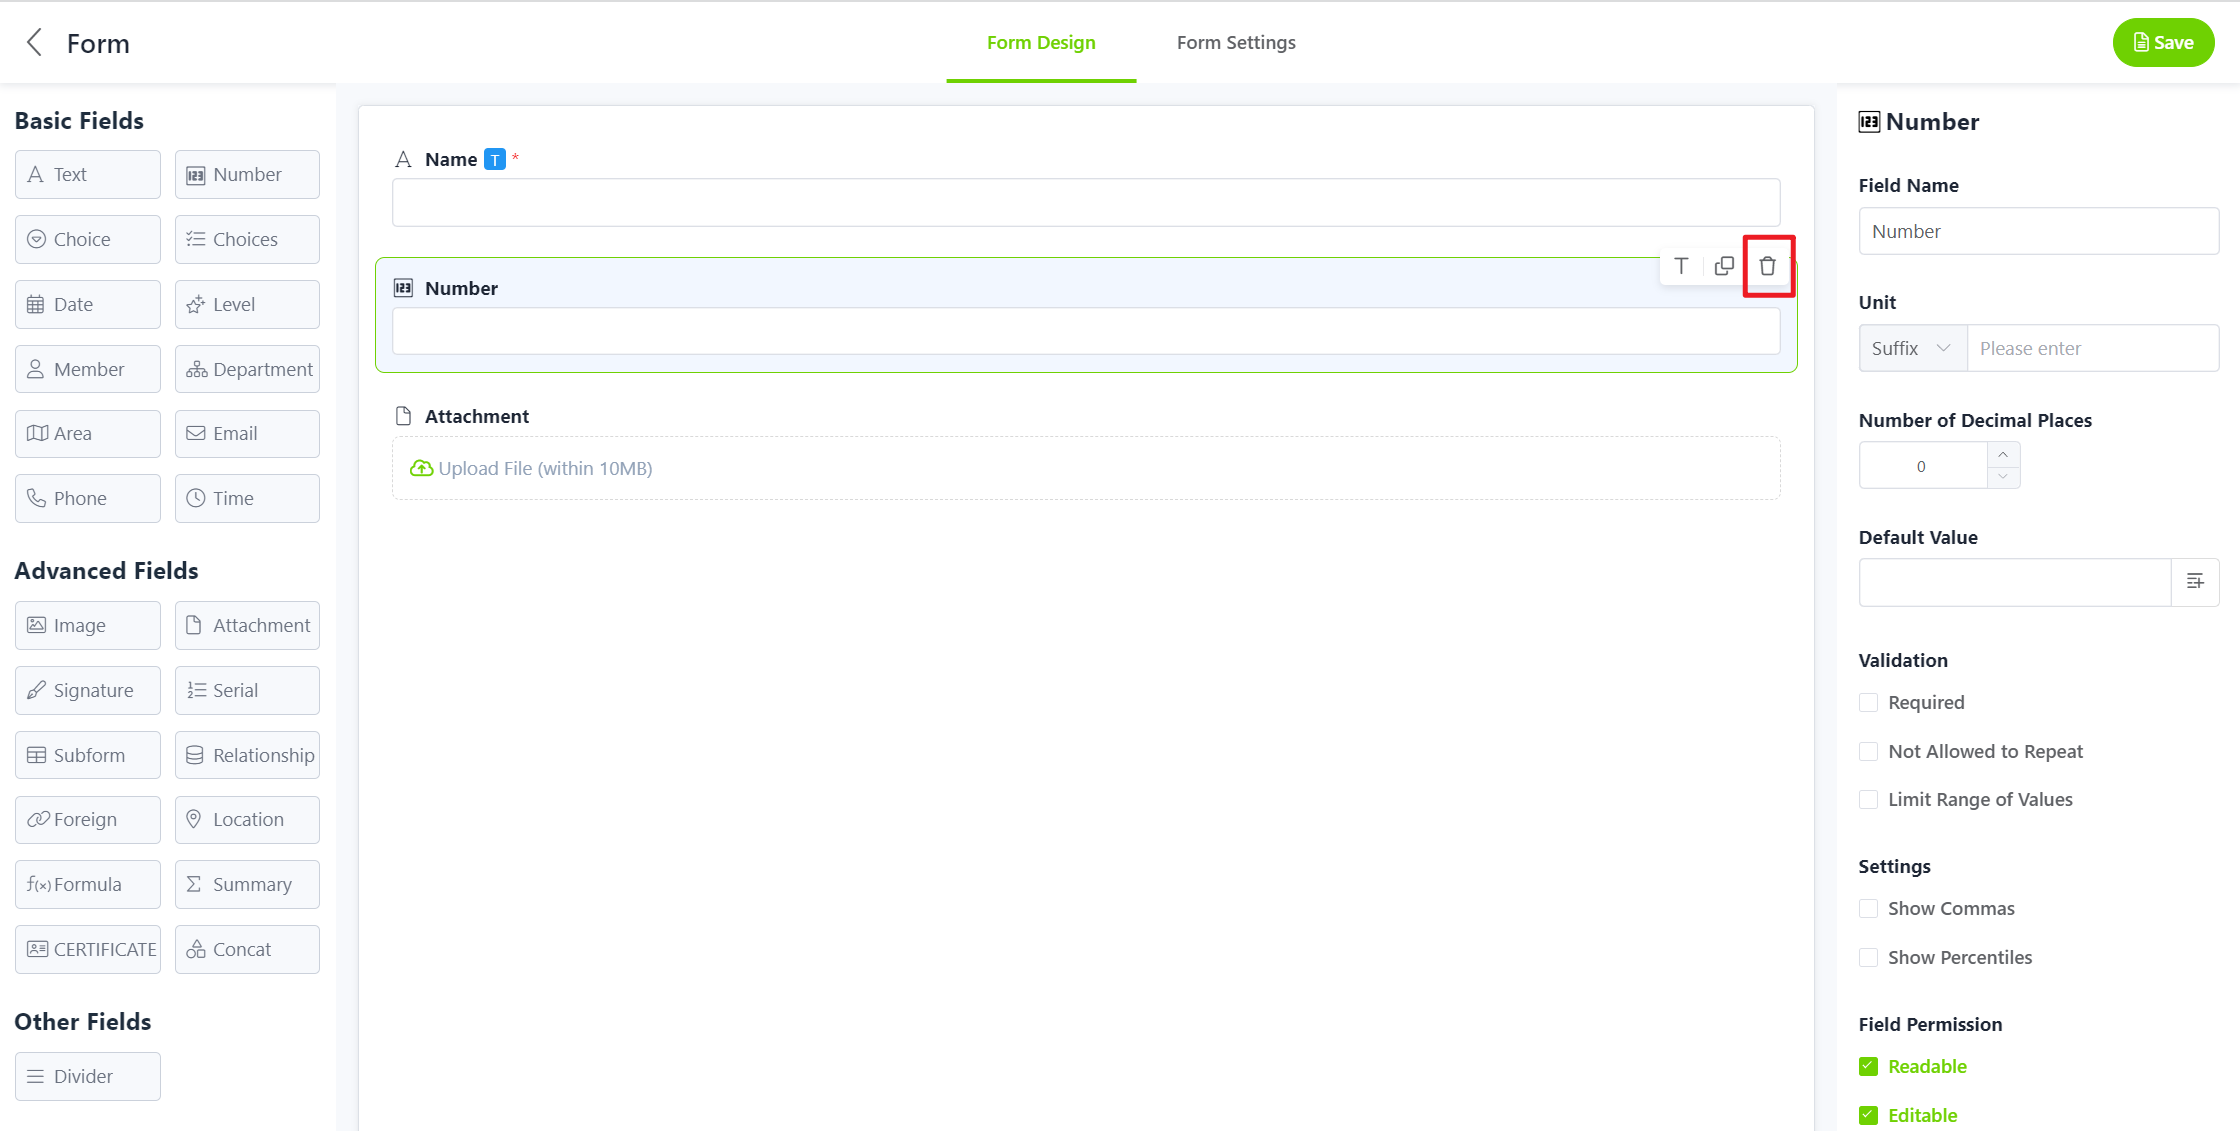
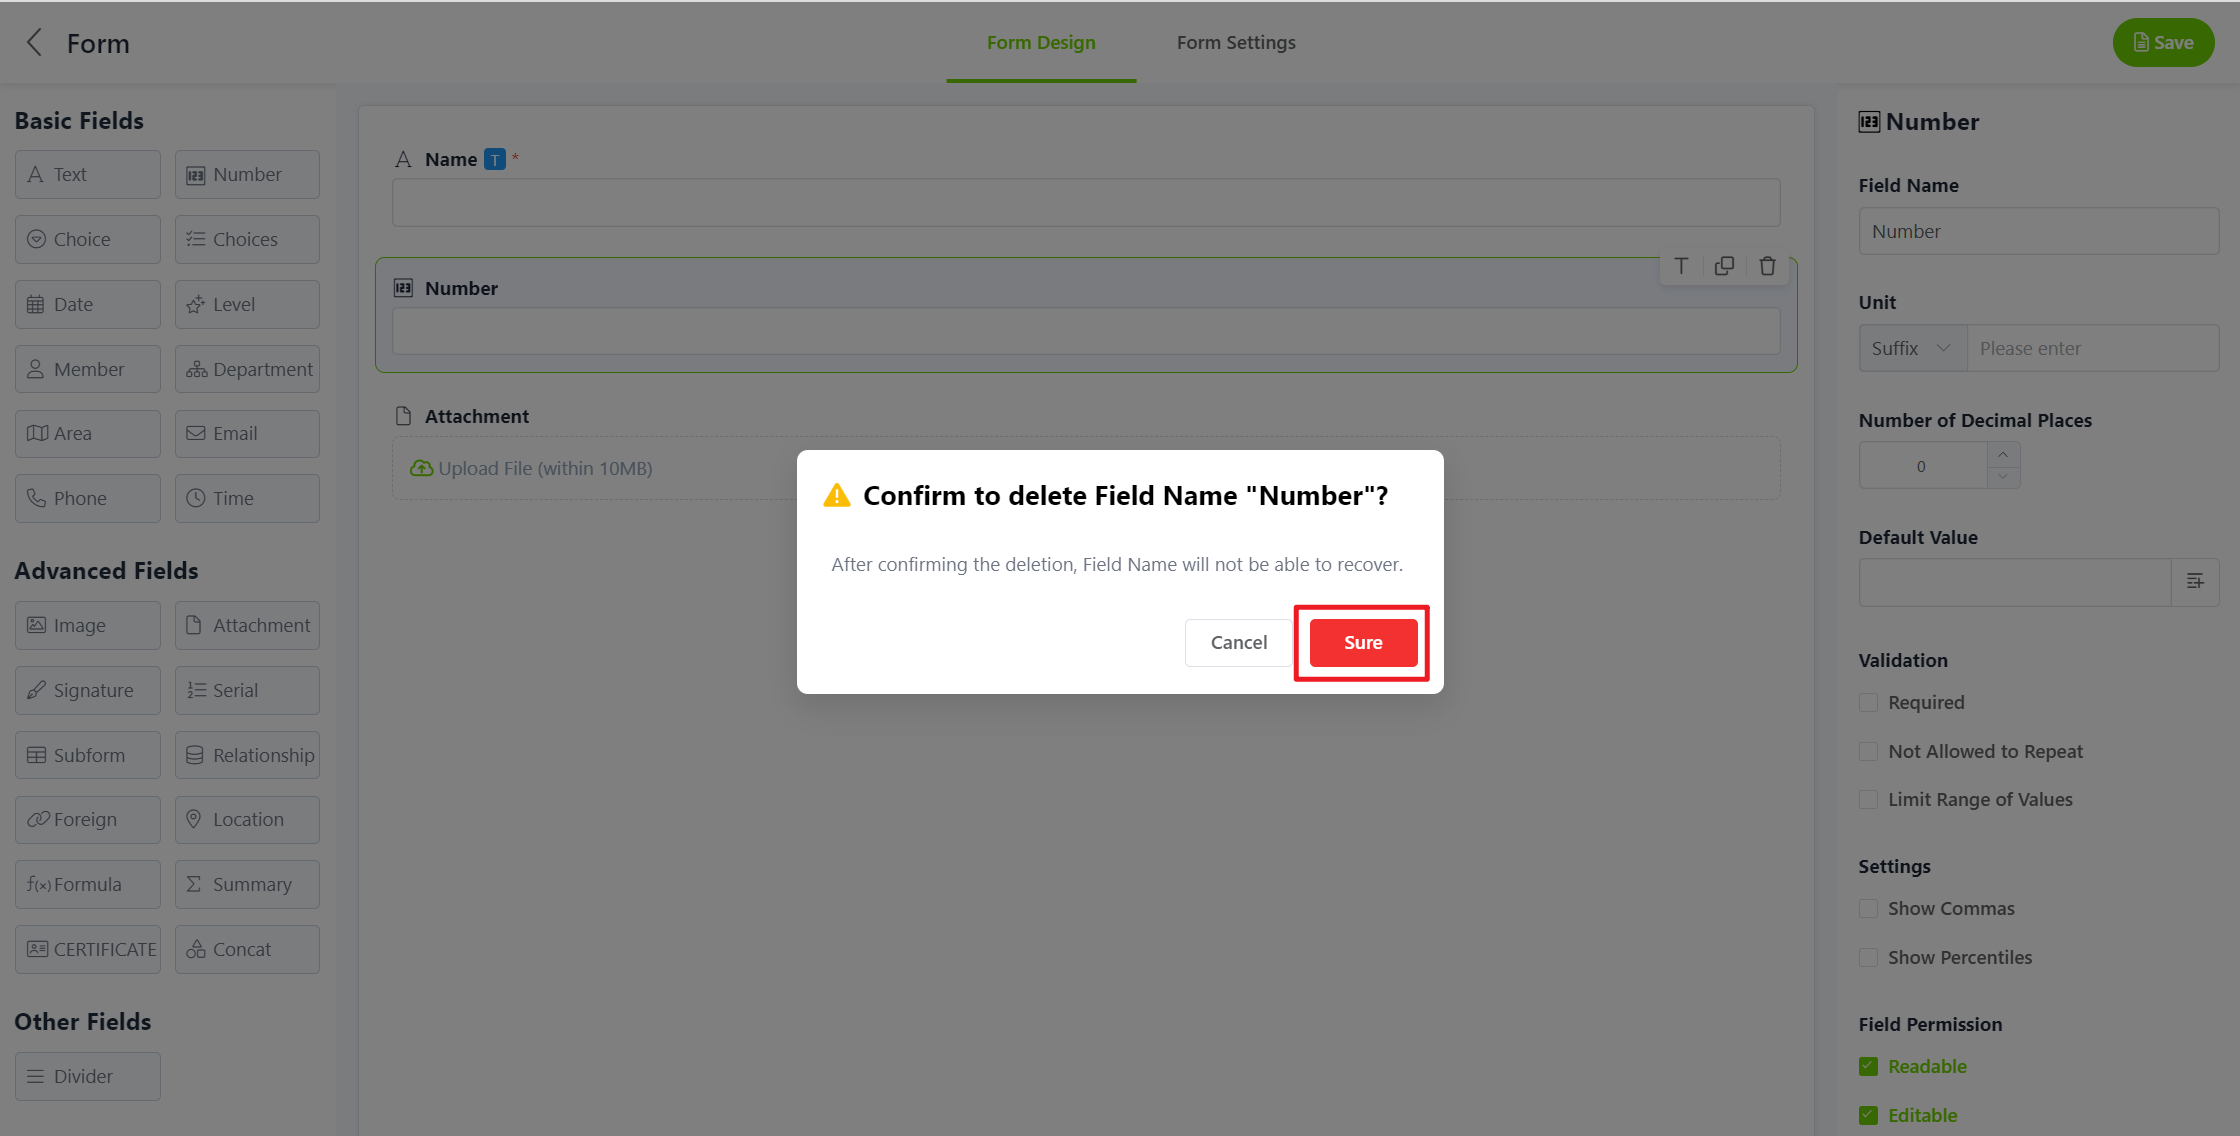
2.5 Delete fields
The [Delete] option will be displayed when the mouse hovers over the field.
Once deleted, this field cannot be restored.
3. Set the field properties
Field properties include fixed properties (name, required, permission, description) and functional properties based on the field (such as numeric controls: functional properties with units and decimal points). For detailed field properties, please refer to the specific field type introduction.
4. Save and check the results
After the form is designed, click the [Save] button in the top right to complete the preliminary setting of the form.
You will then return to the application page and click [+ Create] in the top right to view the results.
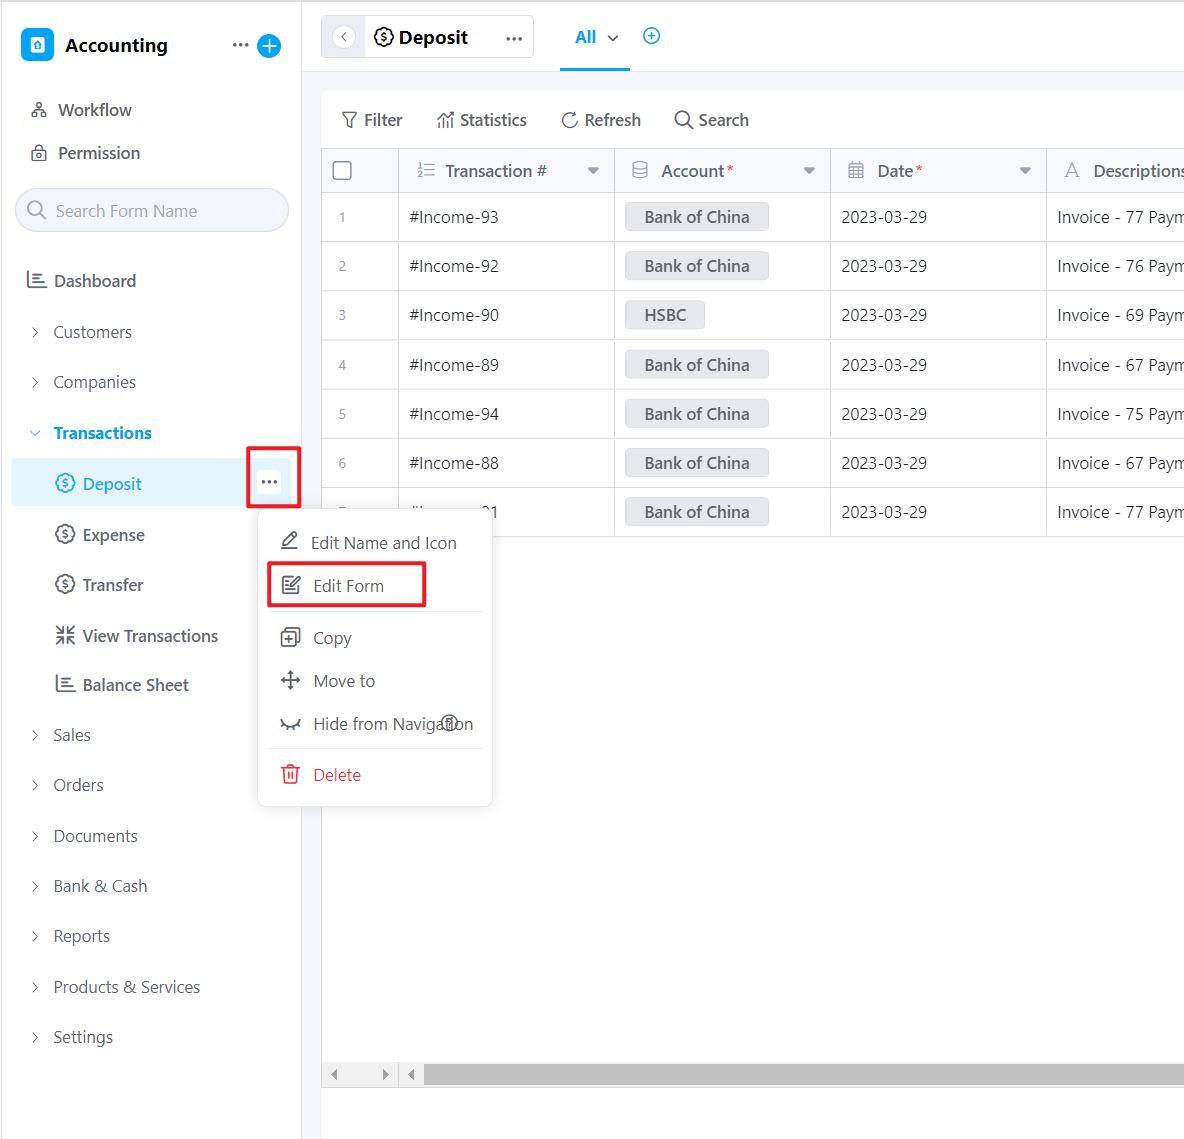
5. Edit the form
Click the form【…】icon and select the【Edit Form】button to enter the edit form page.
