Getting Started
1. Applications
Lancode enables business personnel who do not understand code to quickly build personalized business systems, such as CRM, OA, invoicing management, inventory management, production management, project management, etc., through simple drag-and-drop methods.
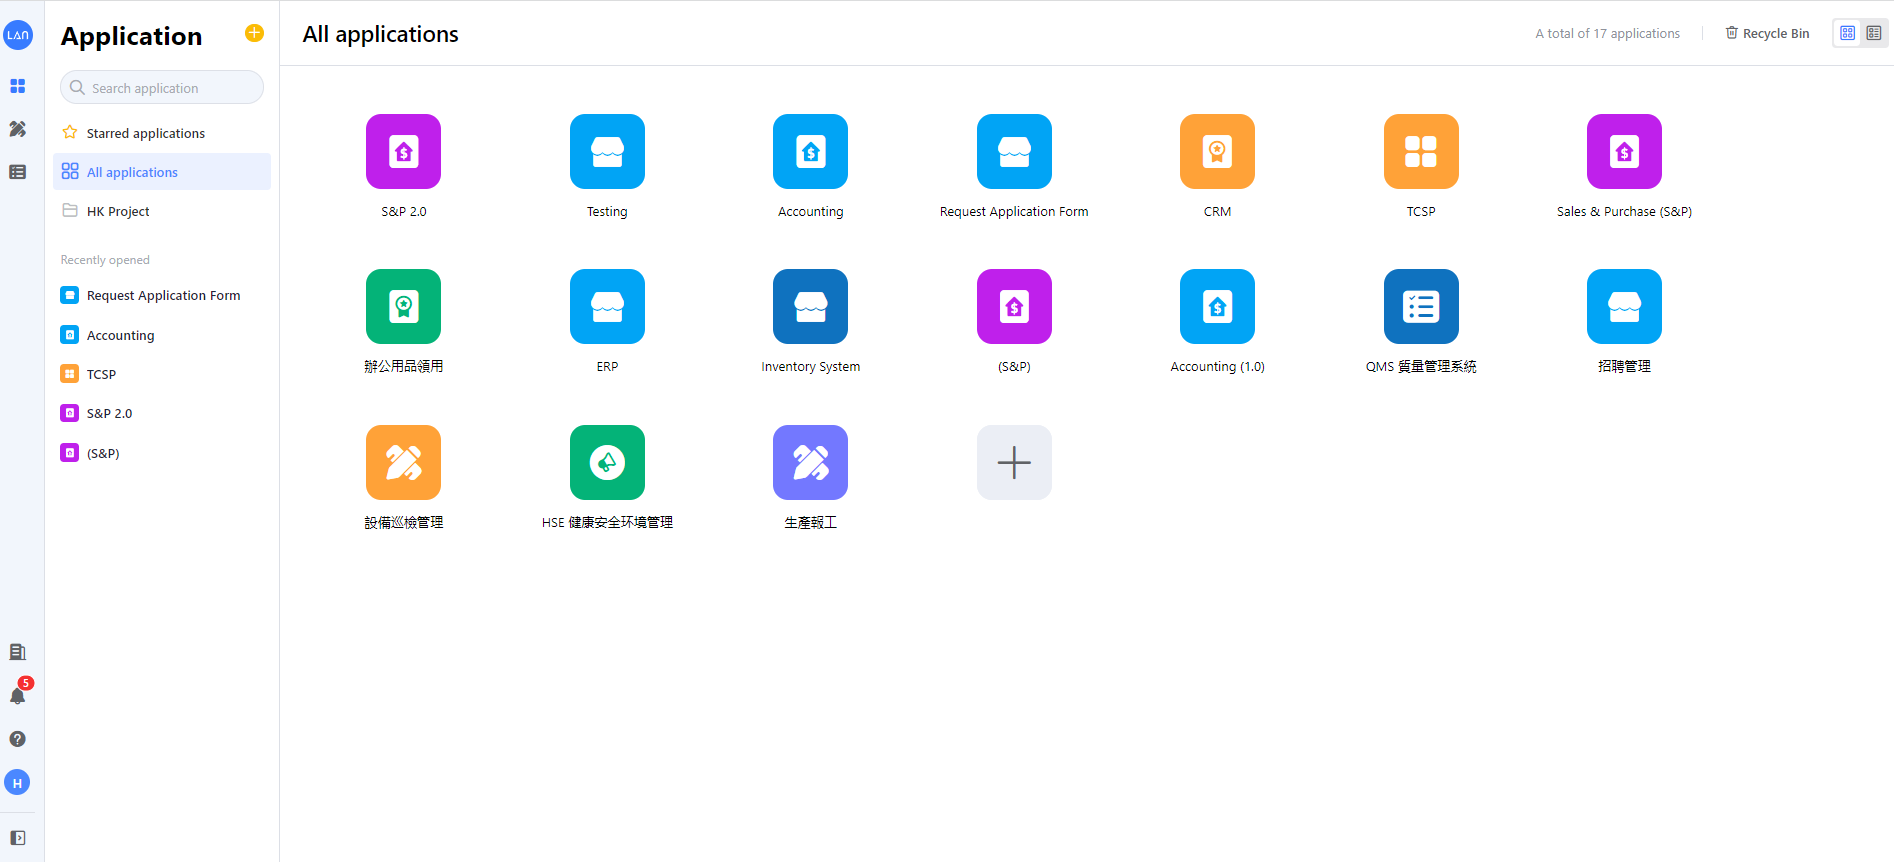
We call these business systems built on the Lancode platform - applications.
An application can be built with core functions such as form, flow, and report engines.
Form engine: Covers forms, views, permission groups, and more. By building forms that meet business needs, the collection and management of business data can be realized; by using views and permissions, multi-person data collaboration can be reached.
Flow engine: Flexibly constructs automated workflows and approval flows, achieve automated data transfer and efficient business collaboration;
Report engine: With the help of statistics, it can achieve multi-dimensional visual data analysis, and with the help of custom pages, it can better build your dashboard/cockpit.
2. Organizing business requirements
Before building the application, we need to sort out the core business requirements:
- The business process to be implemented
- All business data involved in the process
- Personnel involved in the process, and the corresponding operation permission
Take the application for office supplies as an example:
2.1 Sorting out business processes
- The applicant submits the item application form online
- Administrators process applications online
- Notify the applicant to claim the item
- The issuer releases items and modifies the quantity and document status
- Provide administrators with a dashboard to keep track of item claims and item consumption
2.2 Gathering business data
The primary data managed by this application is the request information for item collection (request application form) and the item information forms.
2.3 Involved roles
The roles of the application areapplicant, approver (administrator), the issuer.
2.4 Solutions
According to the application requirements, Lancode provides corresponding solutions:
| Requirements | Solutions |
| The company offers office supplies for staff usage | Create an item information form to record and store item information |
| Applicant submits item request application form | Create an item request application form to record and store item request application information for public release |
| Need to manage all requestedapplication information | Create views for different statuses |
| Approver processes application forms online | Create request approval workflow |
| Inform applicant to claim items after approval has passed | Create a workflow to monitor approval outcomes and send notifications |
| Update item inventory quantity after item issuer confirms item release | Create an item issuer, allow the role to edit data, and update the item quantity |
| Provide a dashboard for management, following the item request situation and item consumption status | Create a custom page to display various types of statistics charts |
3.Building applications
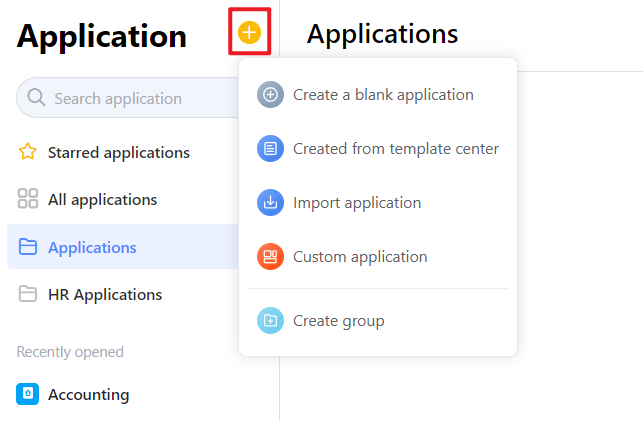
3.1 Create an application
Entrance one:

Entrance two:
3.2 Create a form
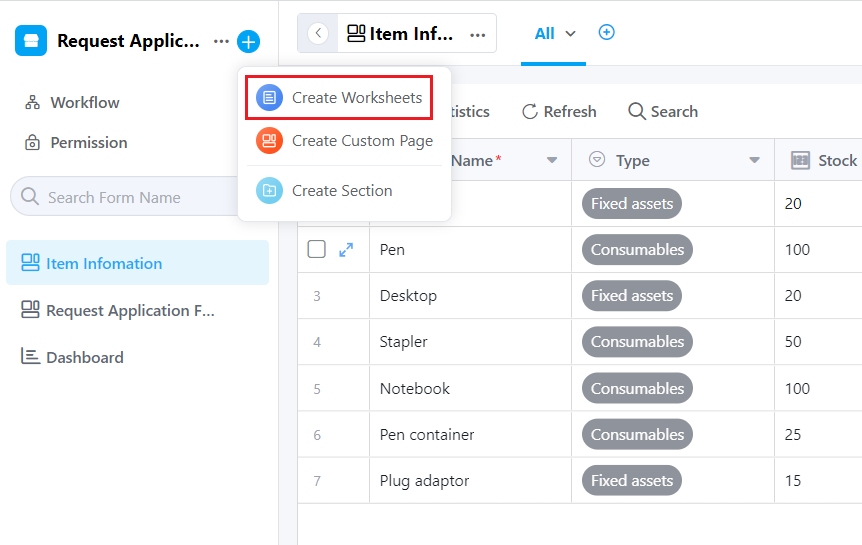
1)Create "Item Information"

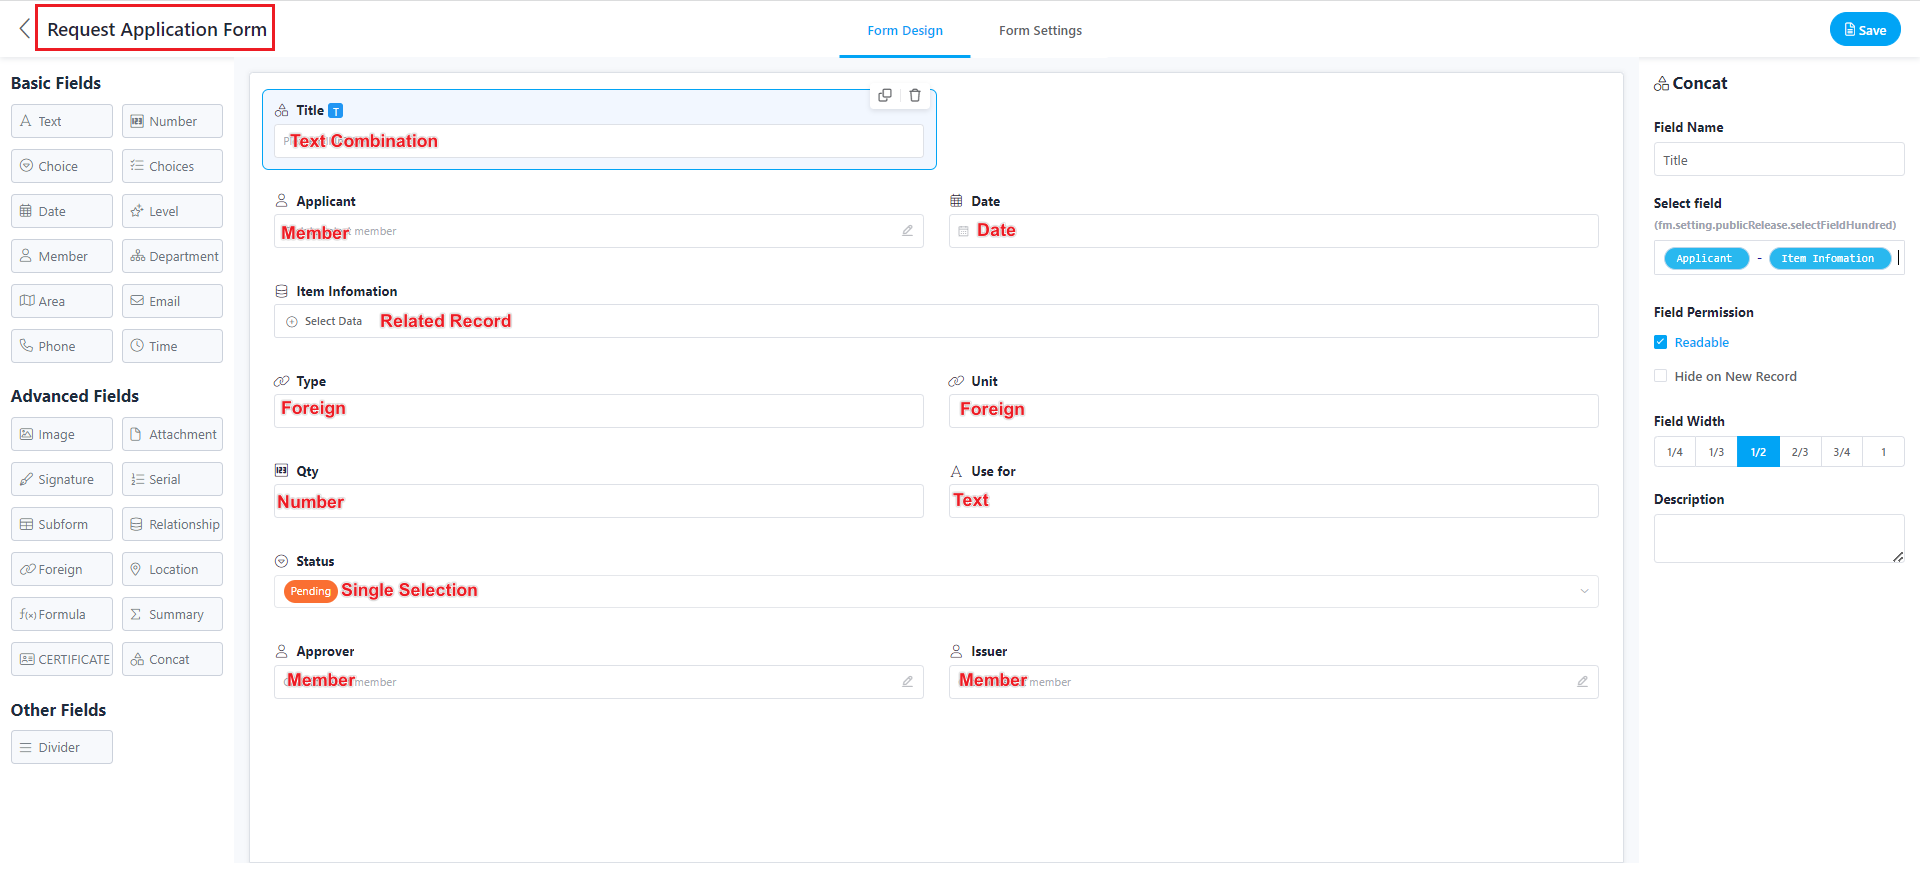
2)Create the "Request Application Form"
● Use the related record field for the name of the item to associate with the "Item Information", so there will also be a two-way reference in the "Item Information" form atthe "Request Application Form"
● Use the reference field to associate the type and unit of "Item Information" automatically
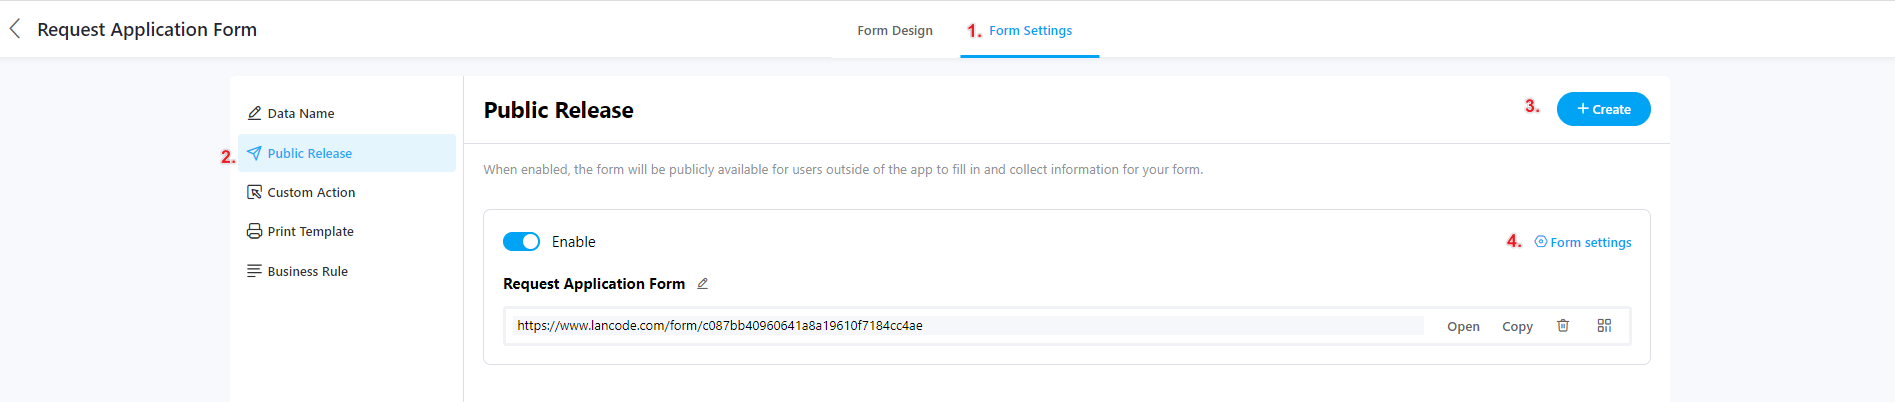
3)"Request Application Form" set as a public form
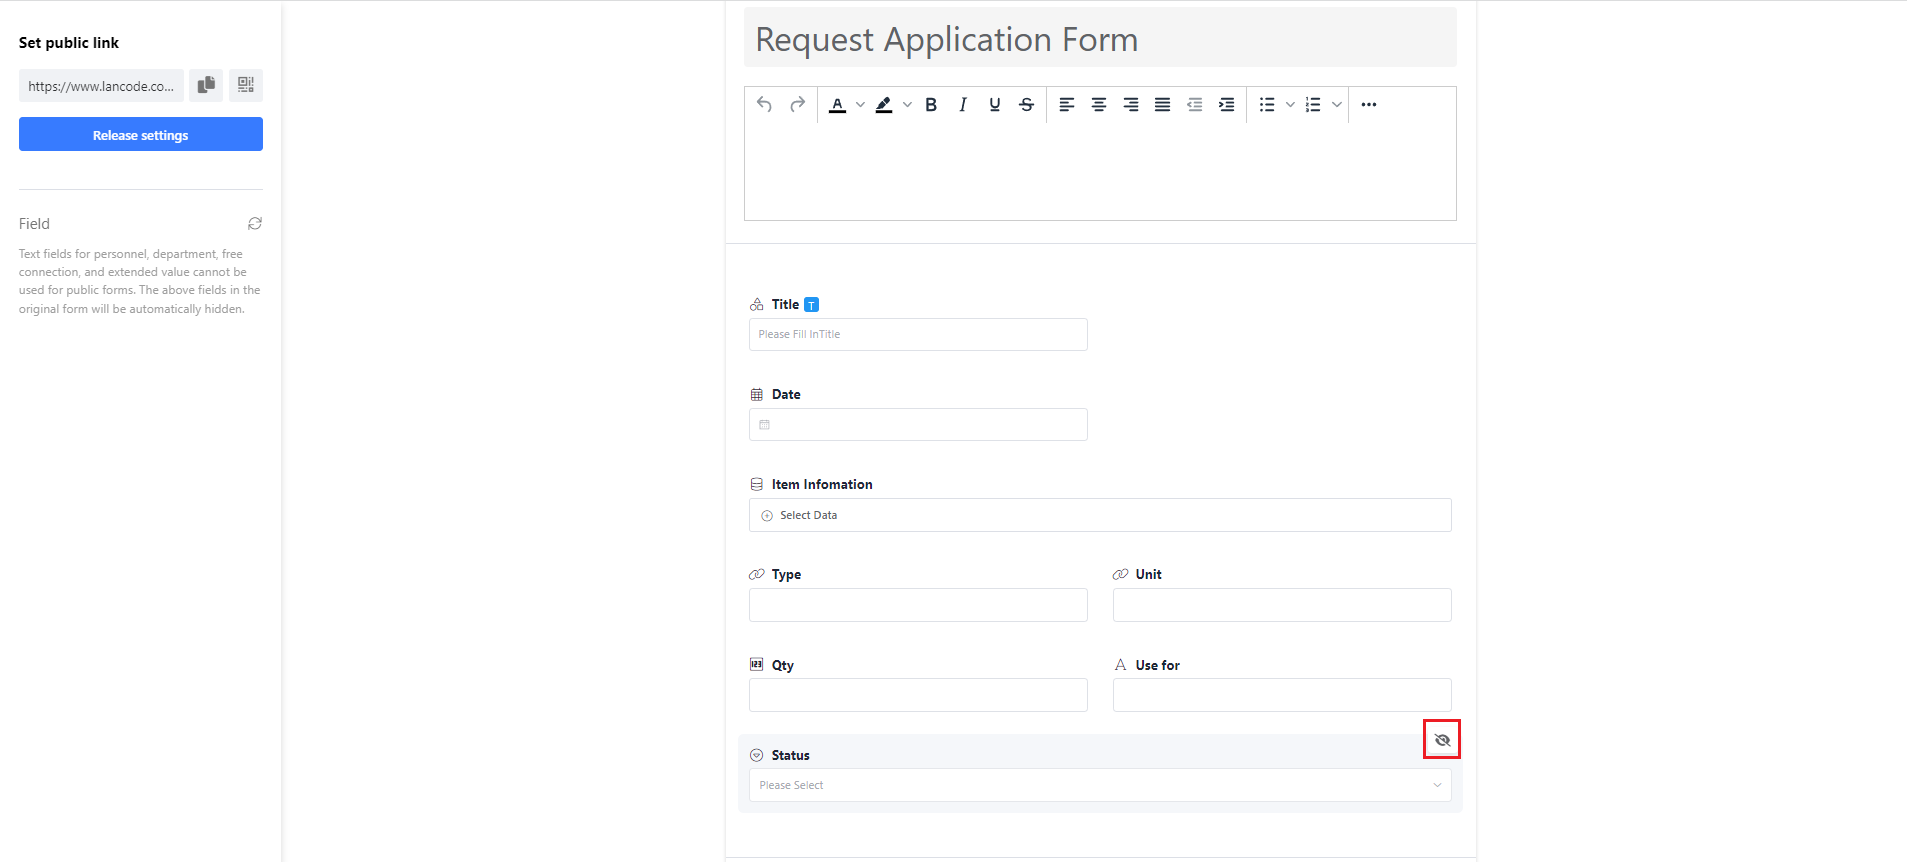
On the Edit Form page - enter Form Settings - Public Release - Create - Form settings The link below is the link to the public form.
Because the status is only for internal purposes, there is no need to collect and share such information externally, so we hide this field.
Result:
The applicant opens the public form link, fills in, and submits the "Request Application Form"

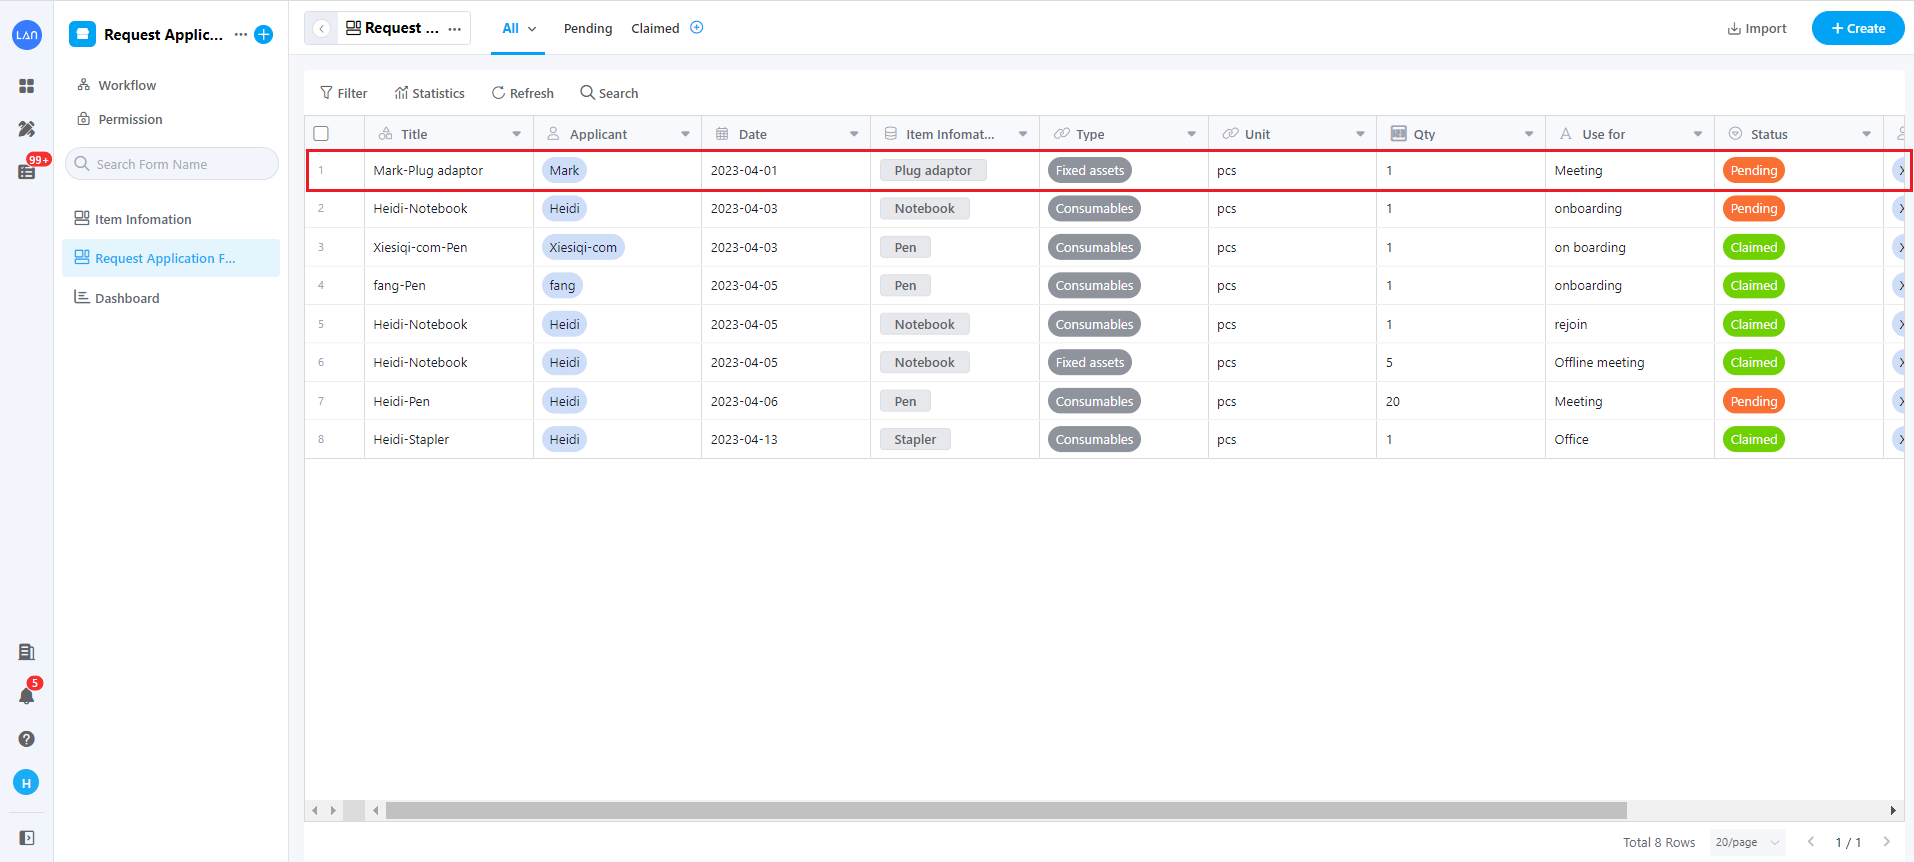
After submission, the administrator can view the relevant information in the system "Request Application Form"
3.3 Creating views
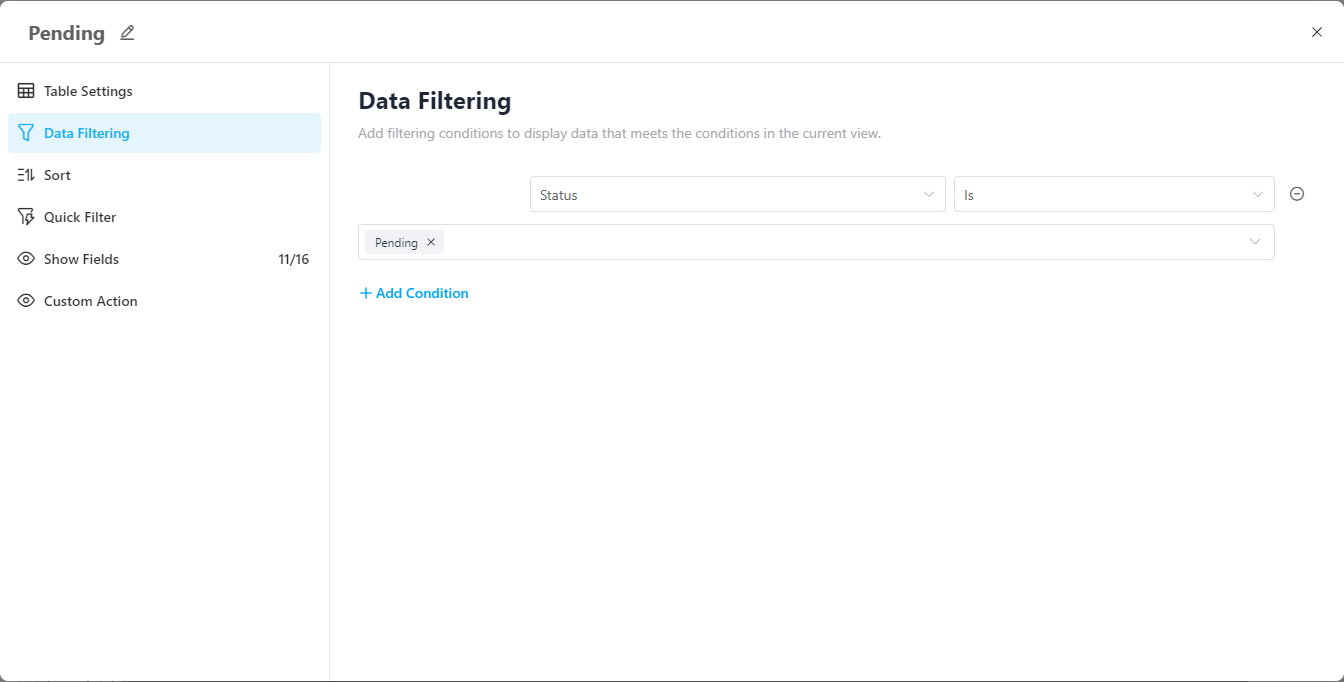
Create views such as "All, Pending, Claimed" for "Request Application".

Through data filtering, if the status is Claimed, the records displayed in the view are only Claimed; the same is true for views of other statuses.
It is convenient for administrators to manage application forms.
3.4 Create role permissions
There is no need to create an applicant role, as anyone can request one by filling out a public form;
The app approver is the administrator, that is, the app creator, and there is no need to create a new permission group;
Only the role is divided into "item issuer".
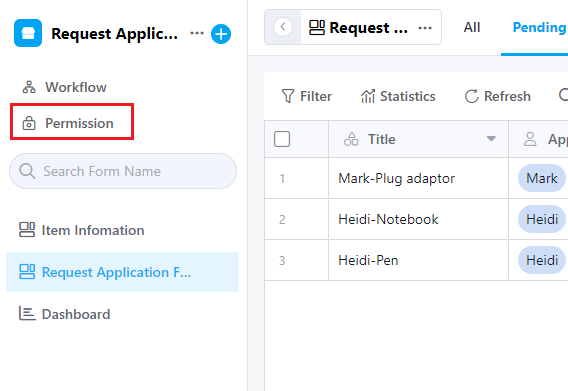
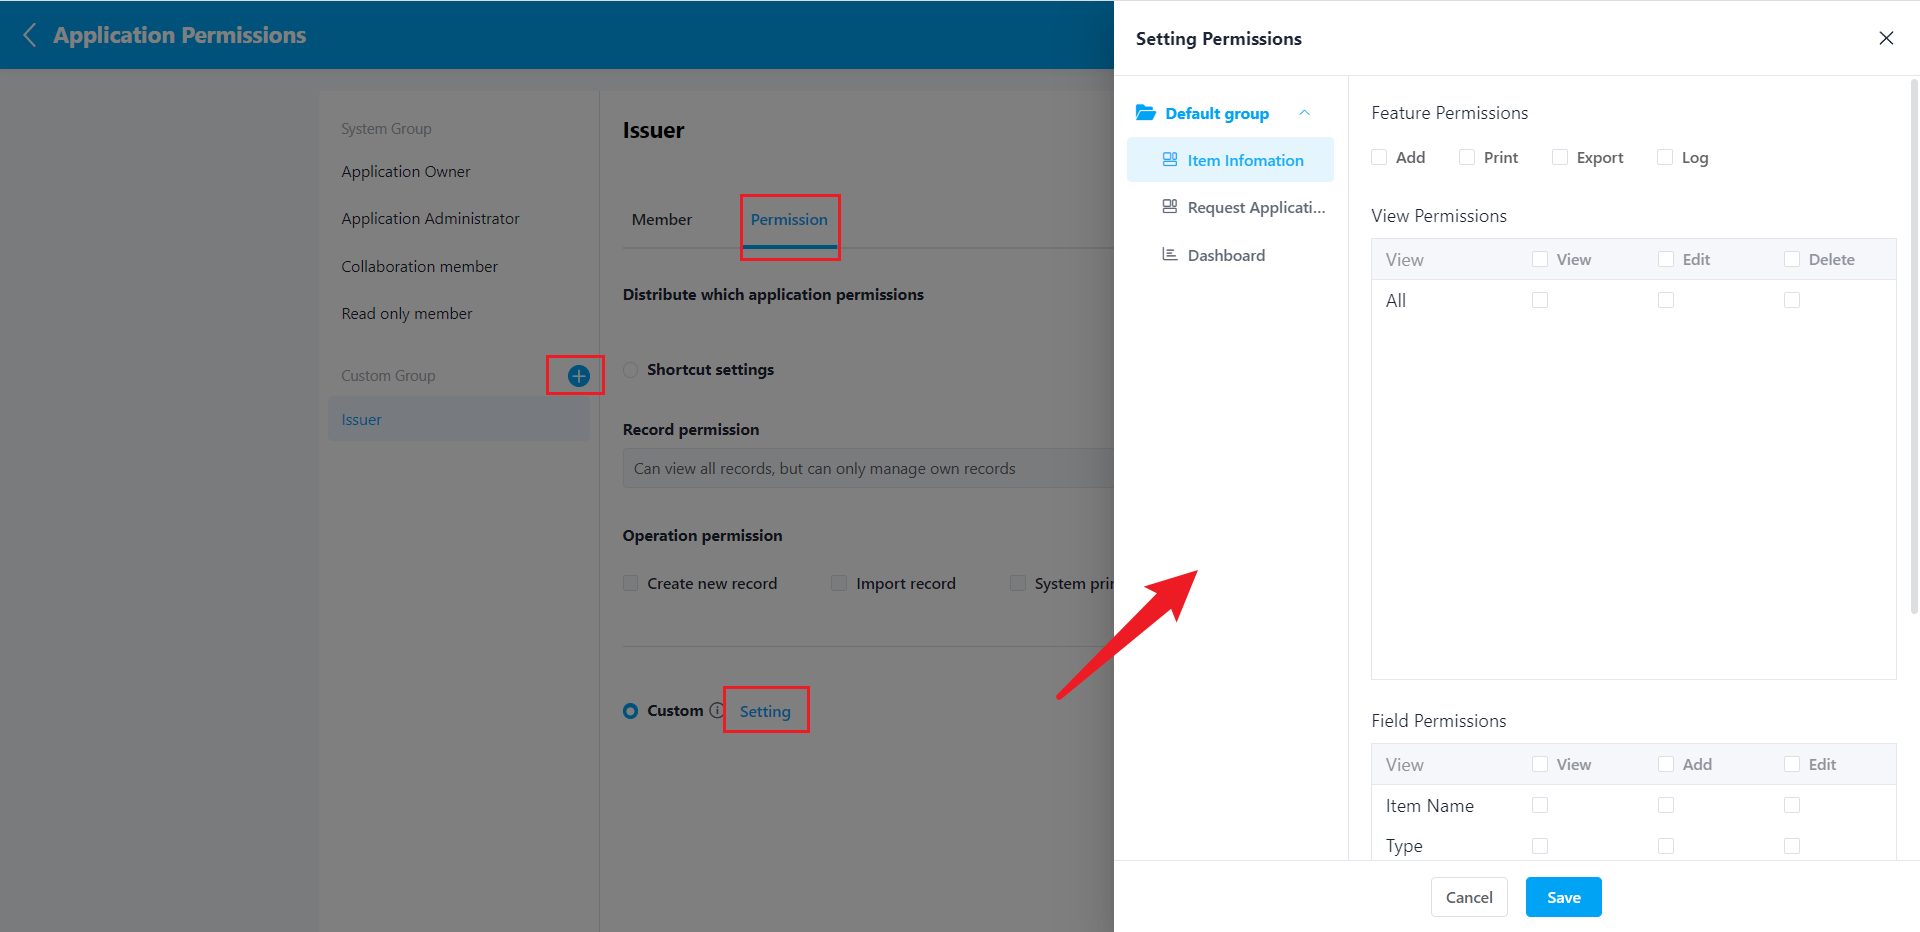
Enter the application permissions page, click Create permission group next to the “Custom Group” text to customize:
The issuer permission group can view all form views and change the "Request Application Form" status and item quantity in the "Item Information".
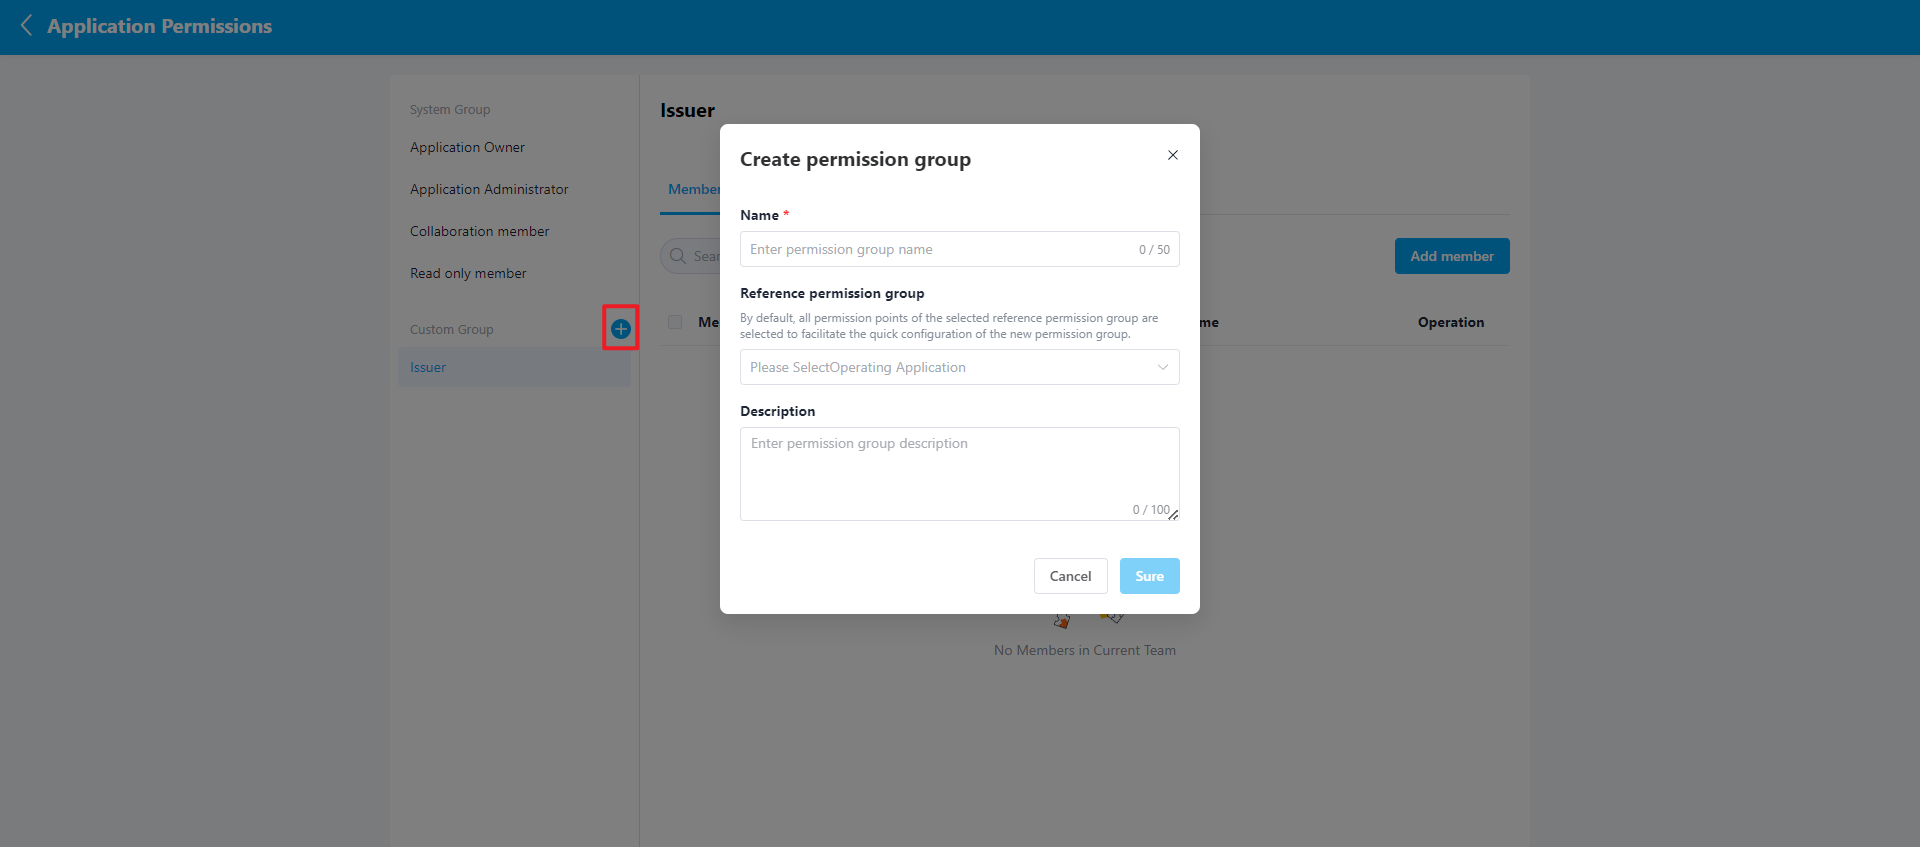
As the image shows: Application Owner: Default as the Application creator, own all application access Application Administrator: Manage the application settings and all data Collaboration member: View data and manage own records Read only member: Only view records Custom permission group - item issuer: Change the issue status and the item quantity.
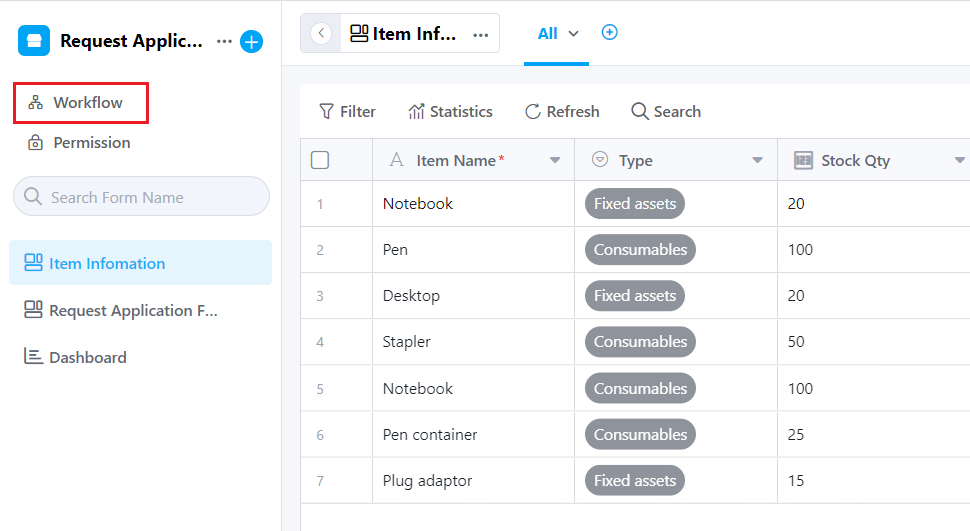
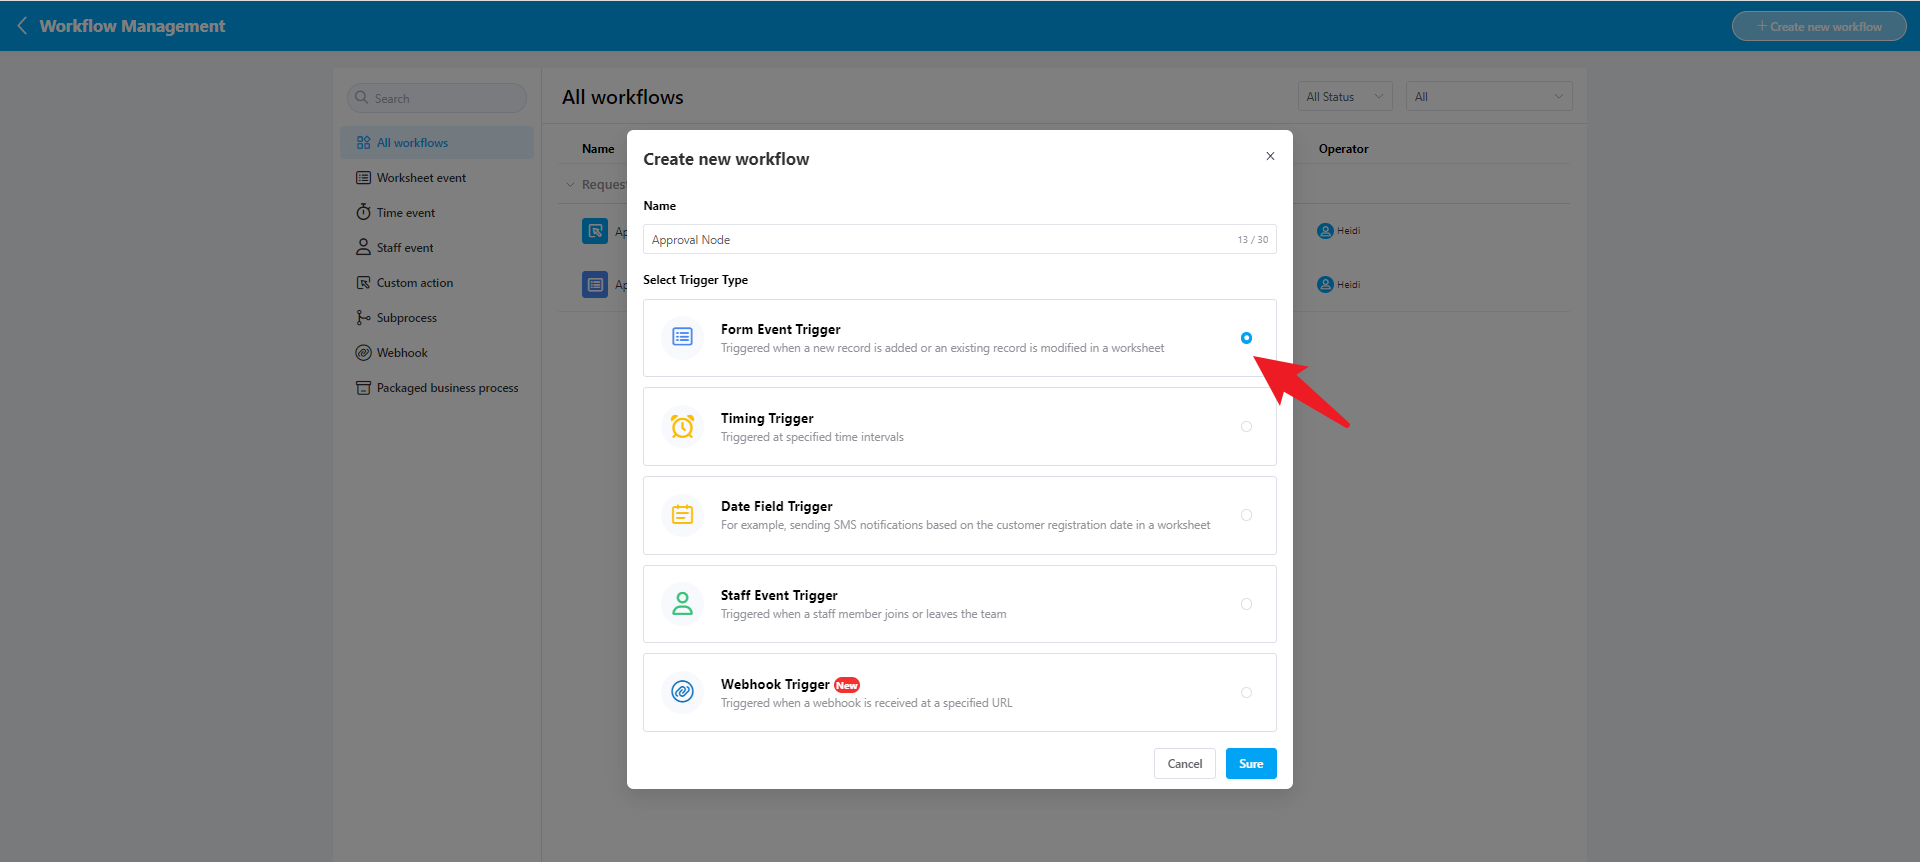
3.5 Create a workflow
Enter Workflow Management, click Create a new workflow, select the corresponding workflow trigger type, and build the workflow.
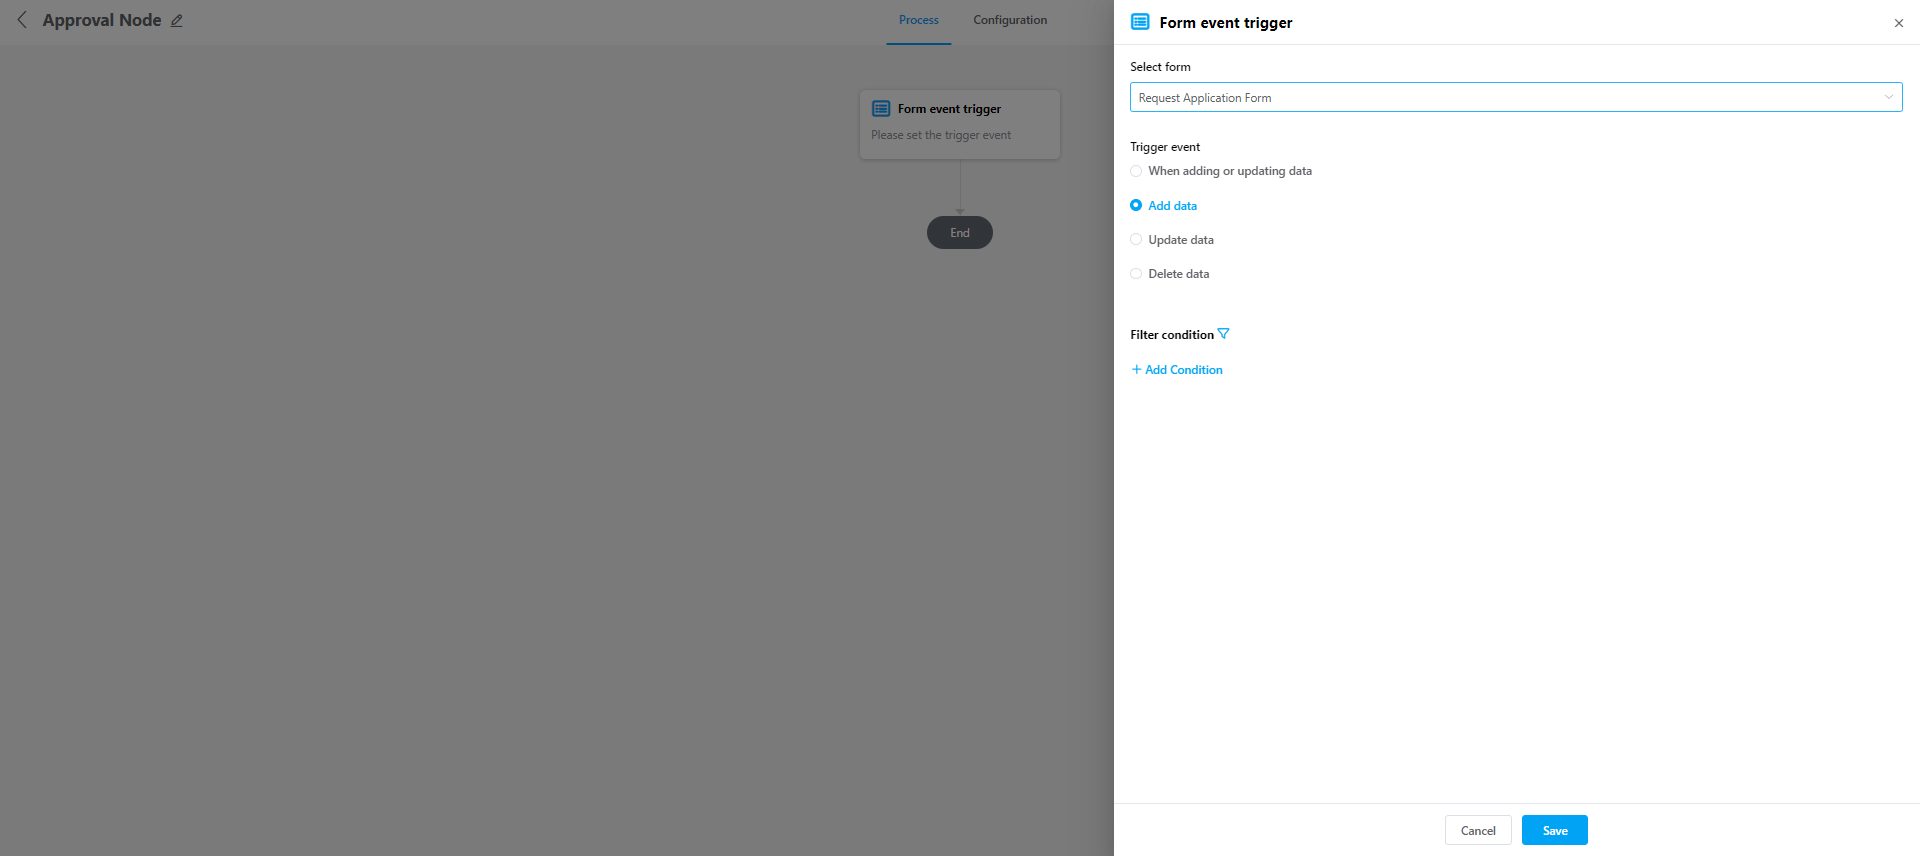
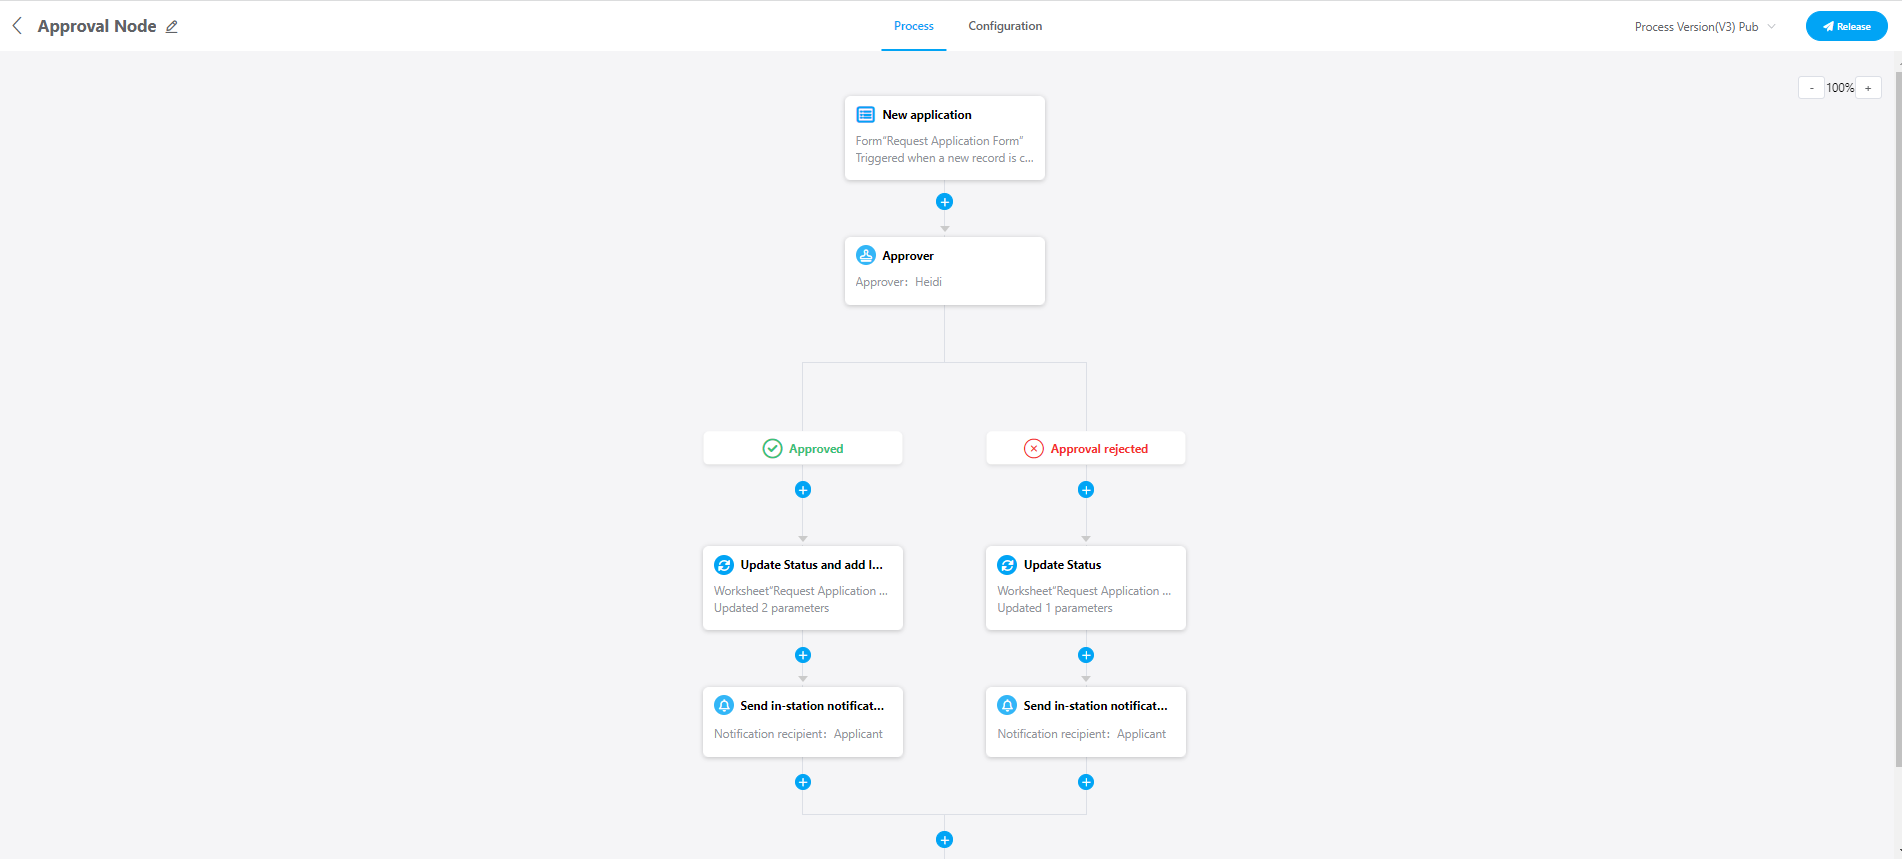
● Adding a new record of "Request Application Form" will trigger the workflow and enter the approval node of the approver ● When the approval is passed, the approval status is changed to Approved, and the item issuer is designated; when the approval is not passed, the approval status is changed to Not Approved ● Notify the applicant to claim
After the applicant receives the item, the issuer can edit the status of the "Request Application Form" to Claimed; and the current item quantity in the item information.
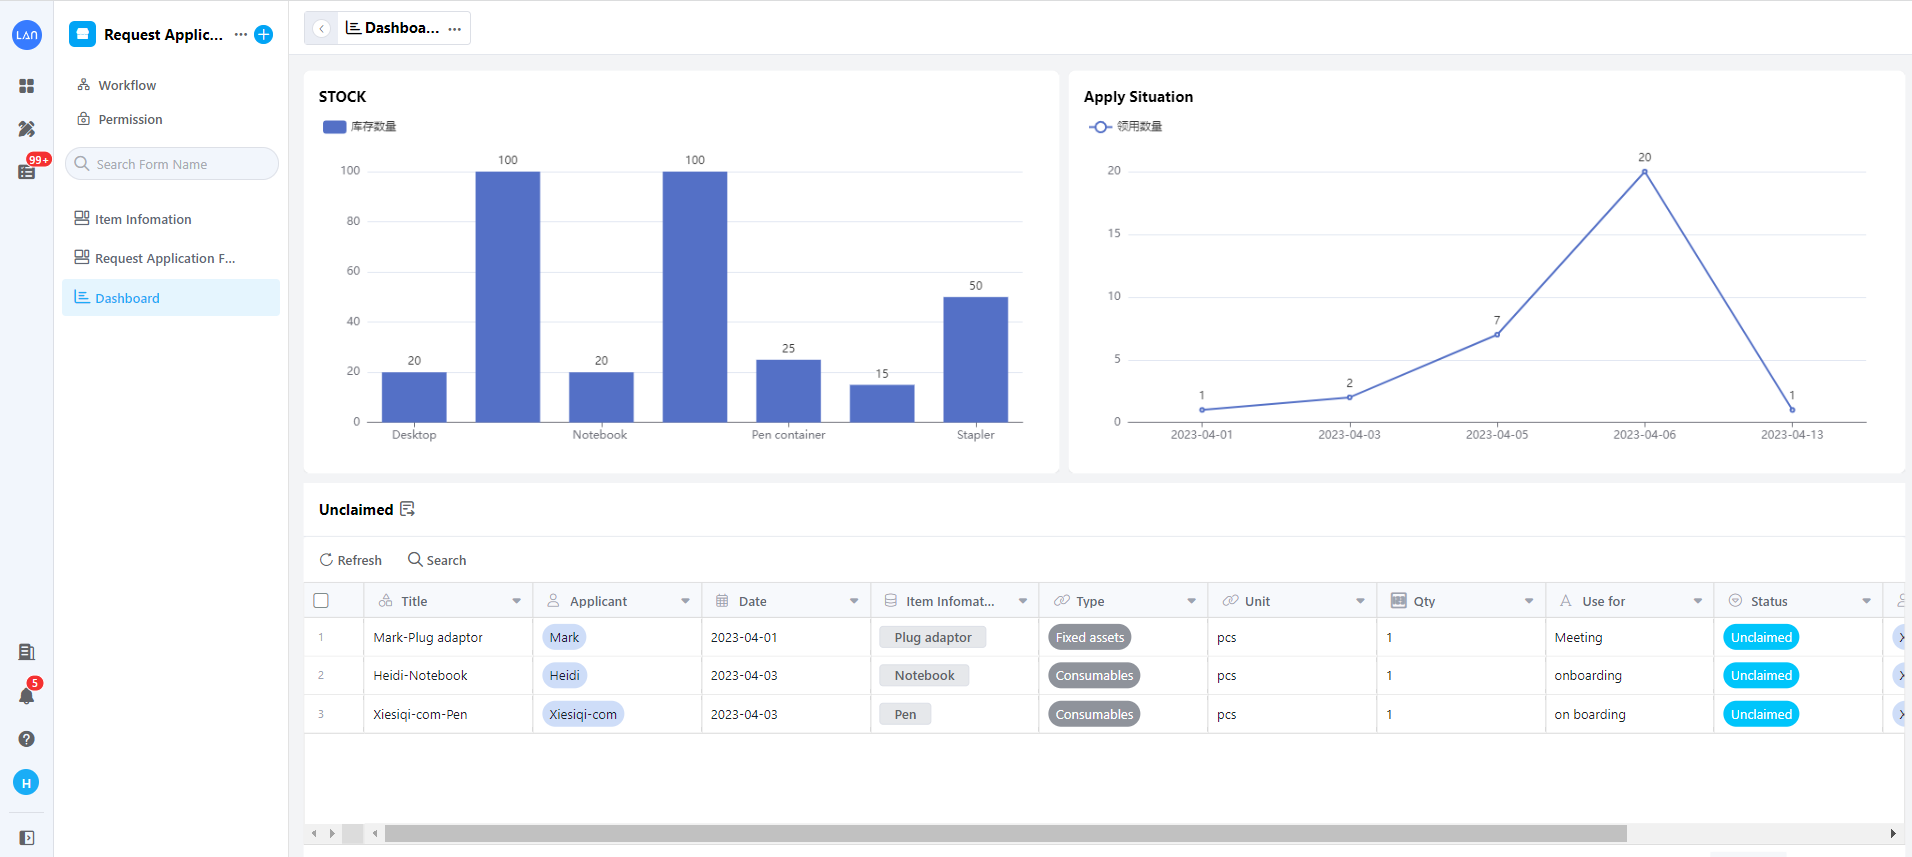
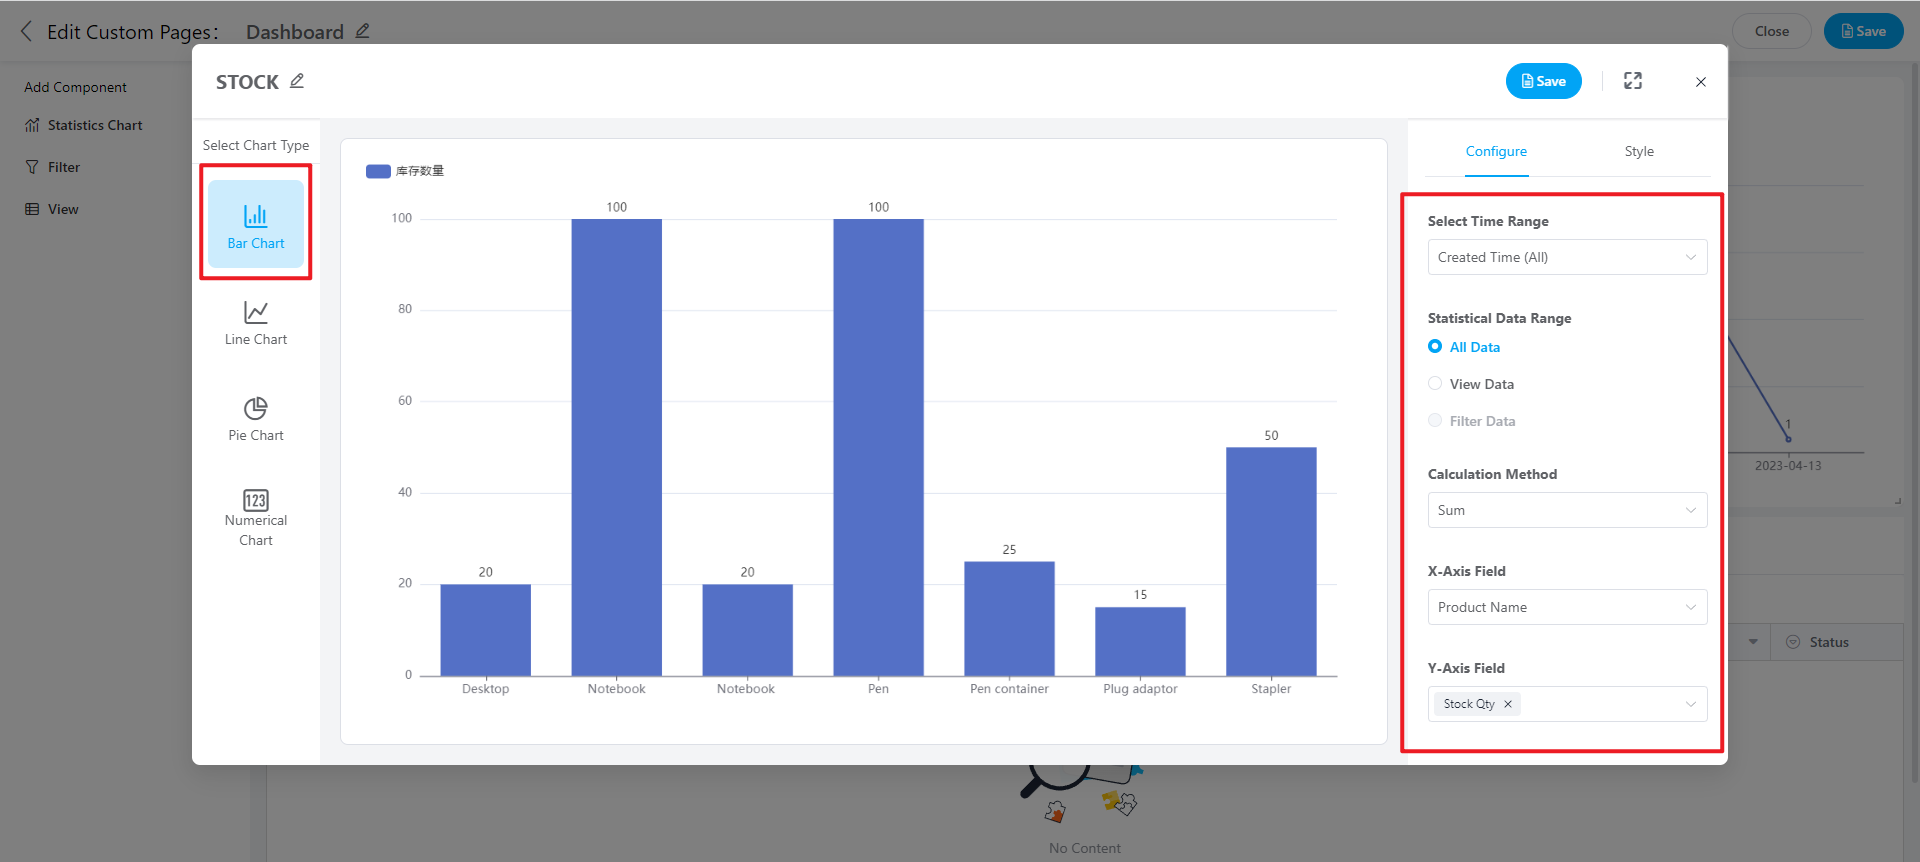
3.6 Create a custom page
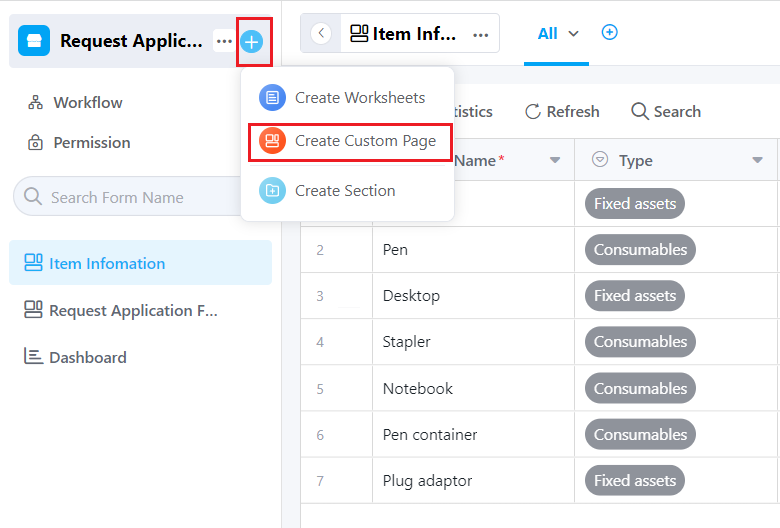
1)Statistics Chart Create a custom page, add a statistics chart, select a form, select a chart type, select a data source, set the statistical data range, calculation method, XY axes (dimension), name the chart, and click Save.
2)View Add and name a view component, select the form source, view, etc., and click Save.
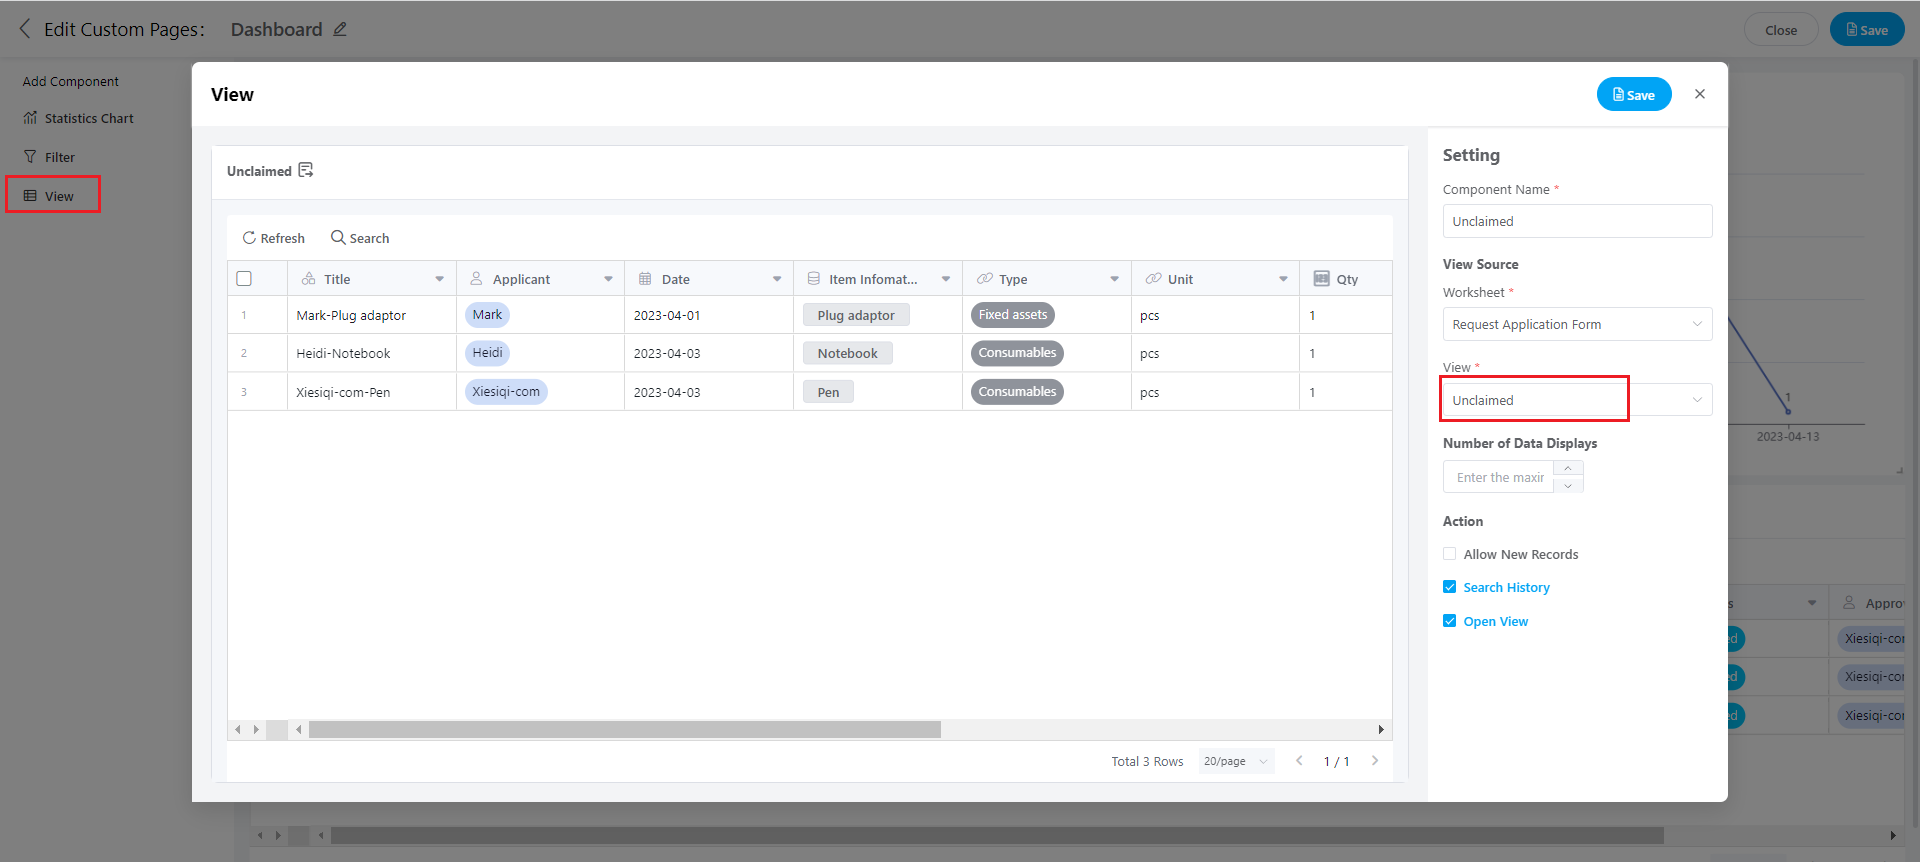
Finally, as shown in the image below, the custom page is constructed with the item inventory quantity for each type, item request situation, and application form of the unclaimed item so that the administrator can manage and view it conveniently.