Custom Action
1. Functionality Overview
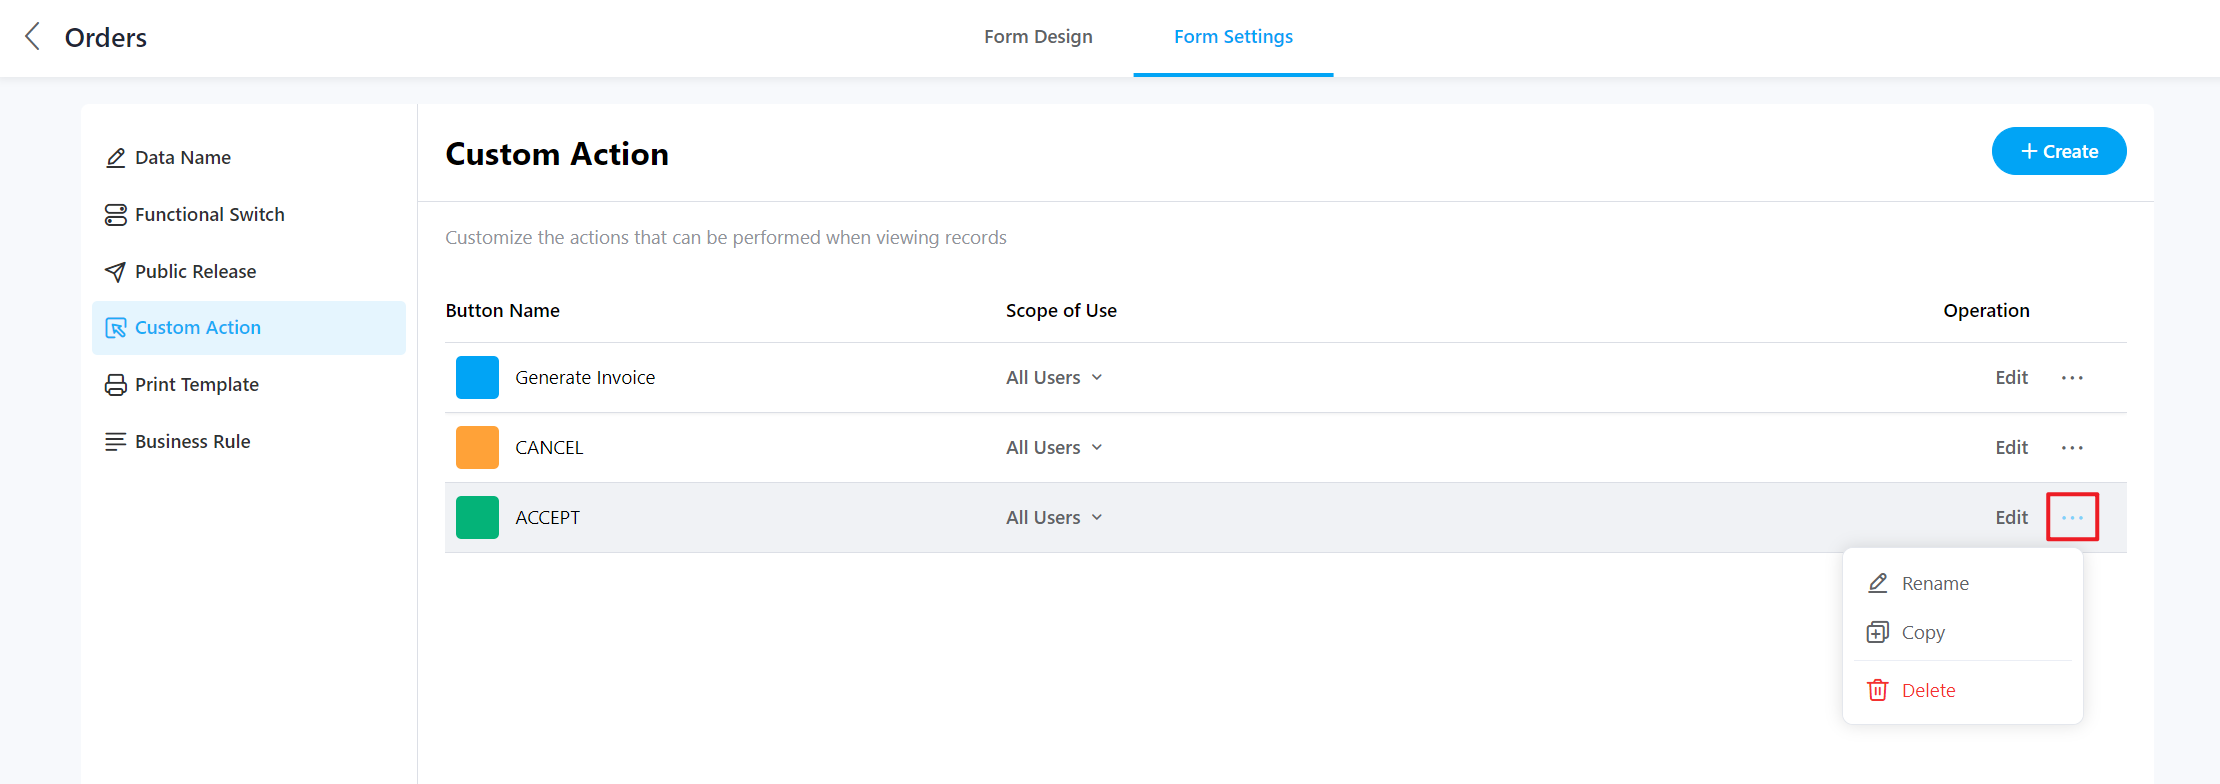
Custom actions add a button within the record details page, allowing users to execute automated workflows by clicking the button. This process is referred to as a custom action.
As shown in the image:
【Generate Invoice】, 【ACCEPT】, and 【CANCEL】 are buttons added by administrators.
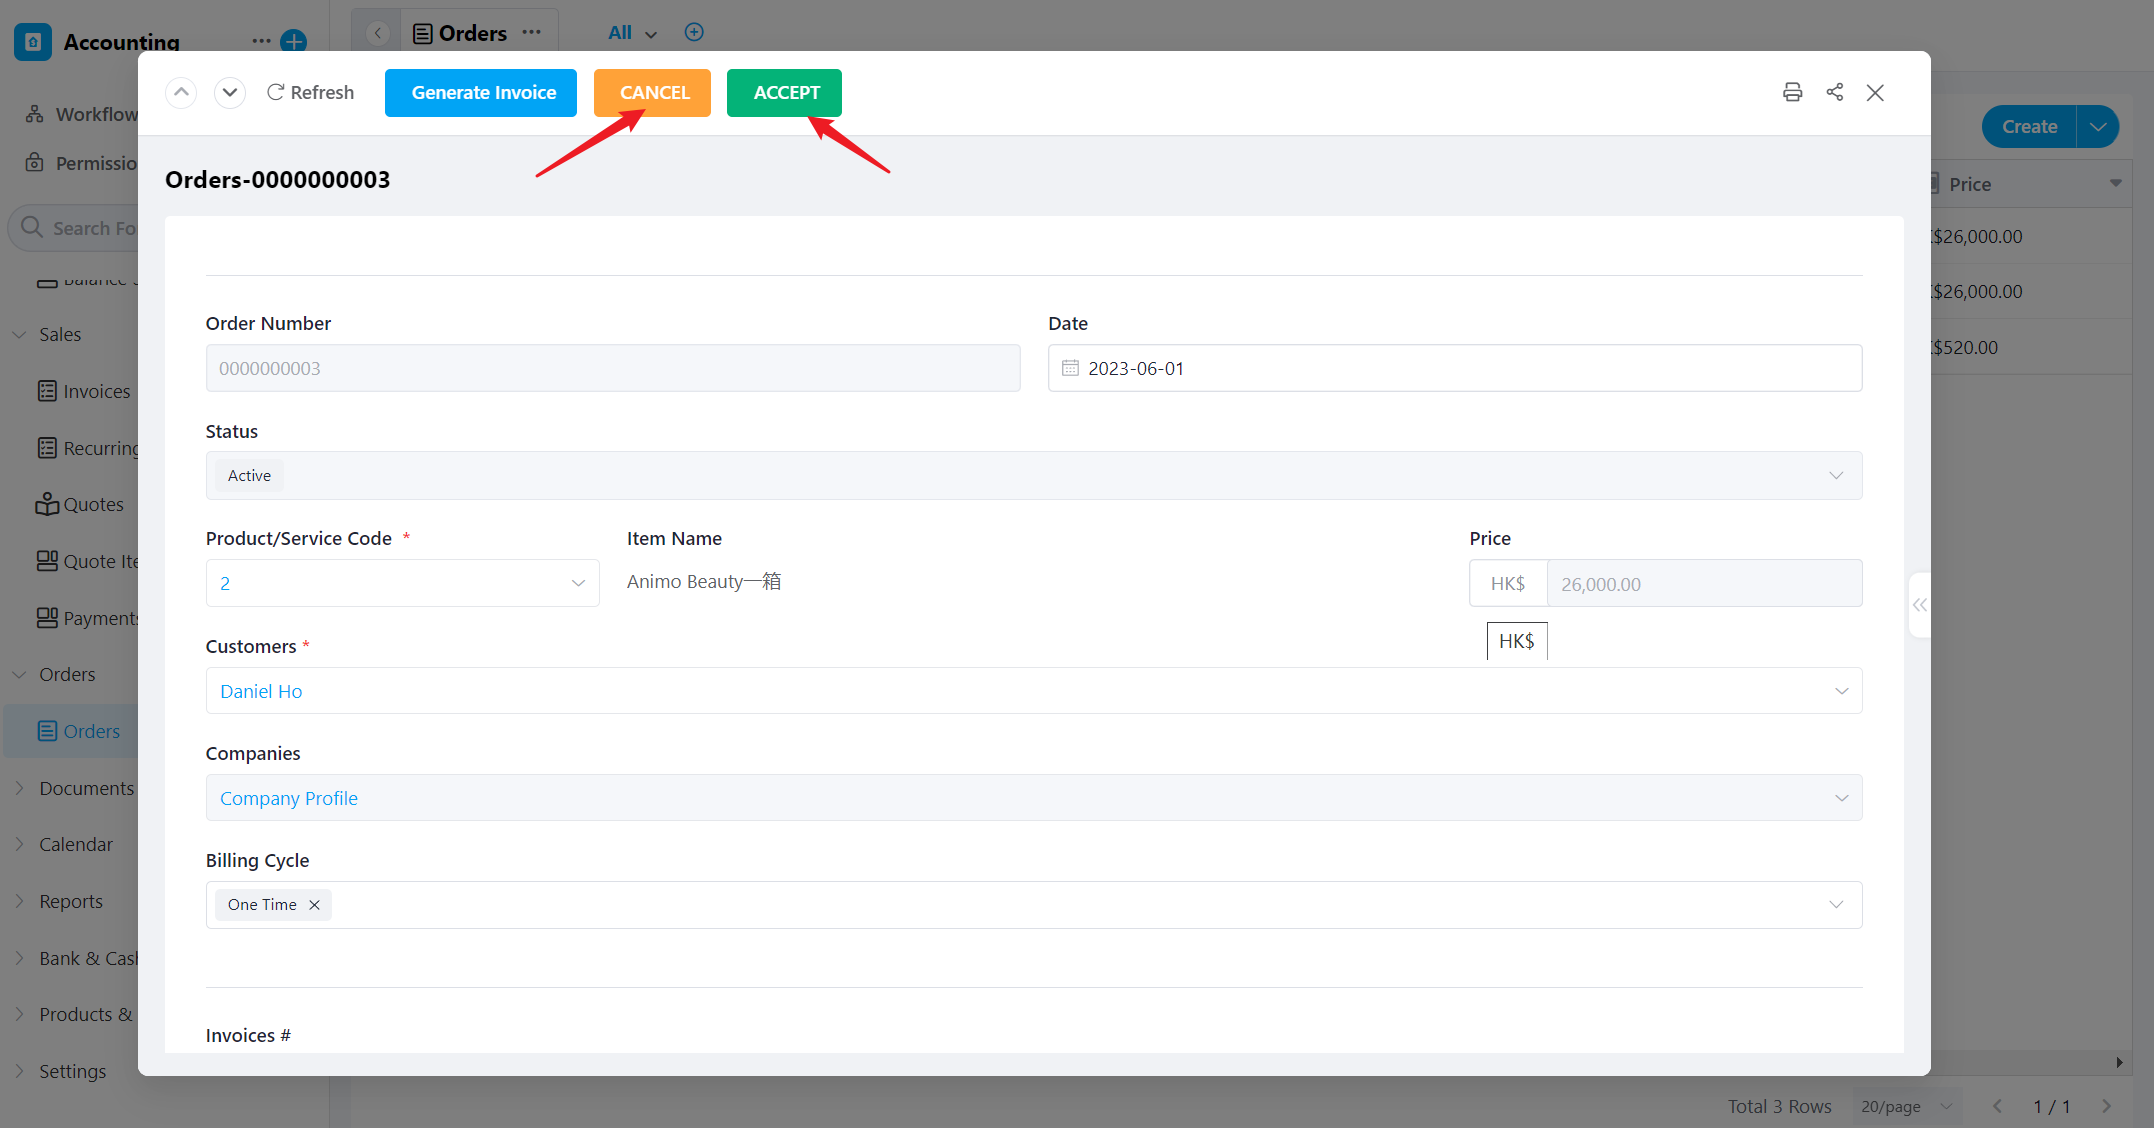
Effect of Clicking the Button:
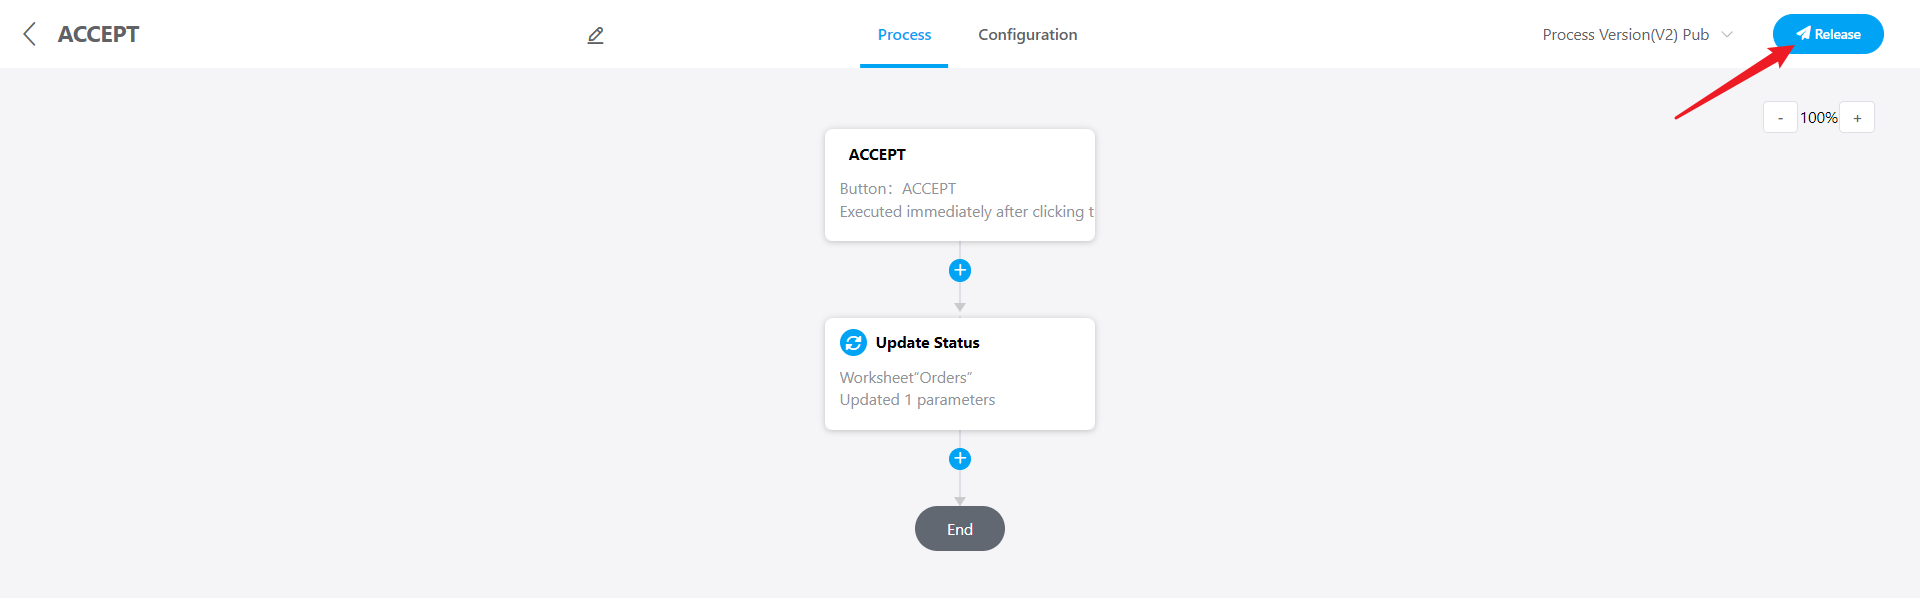
- Clicking the 【ACCEPT】 button triggers a workflow that automatically sets the "Status" field in the record to "Active".
2. How to Configure Buttons
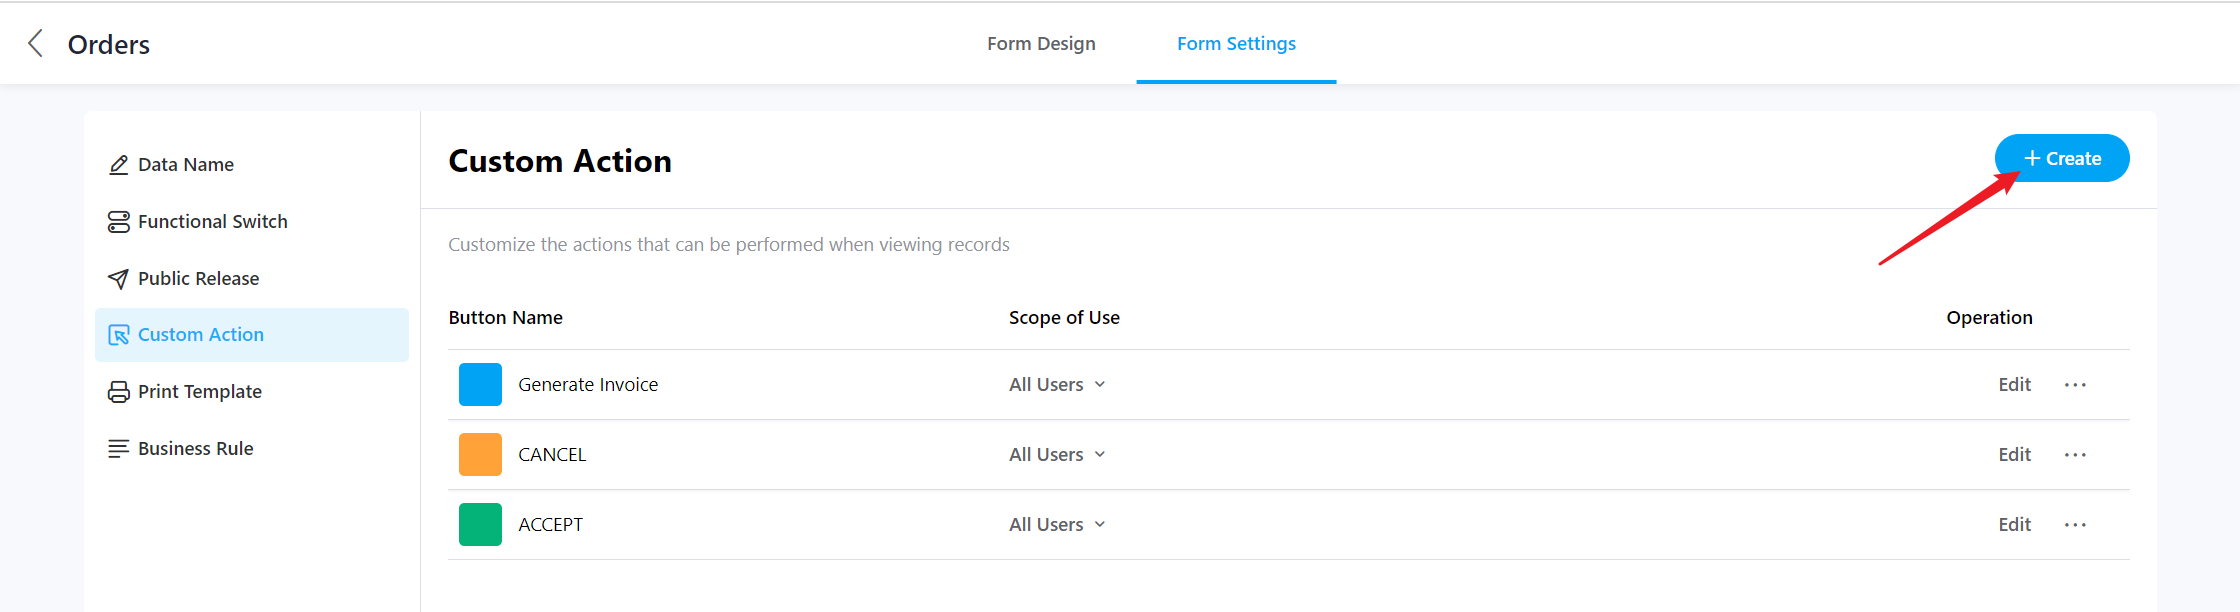
2.1 Adding Buttons
Navigate to the edit form page of the worksheet > Click on Form Settings > Custom Action > Create.
2.2 Configuring Buttons
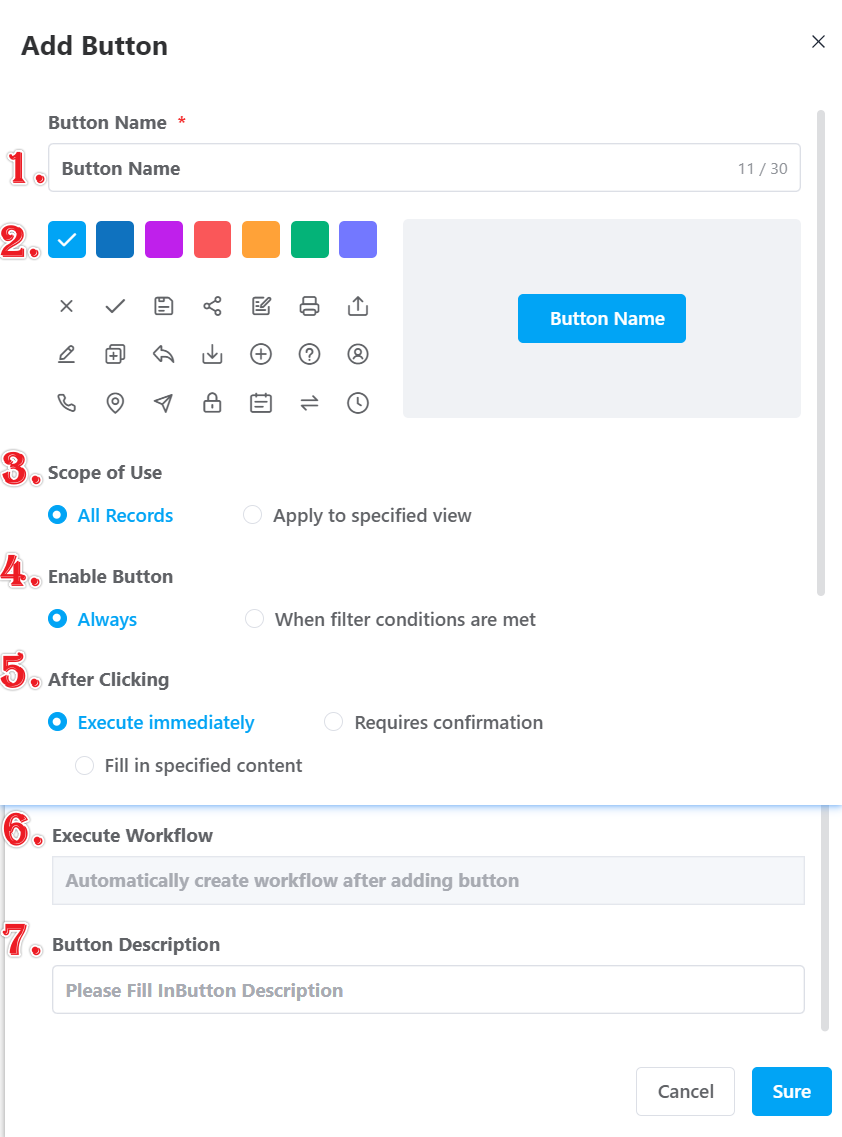
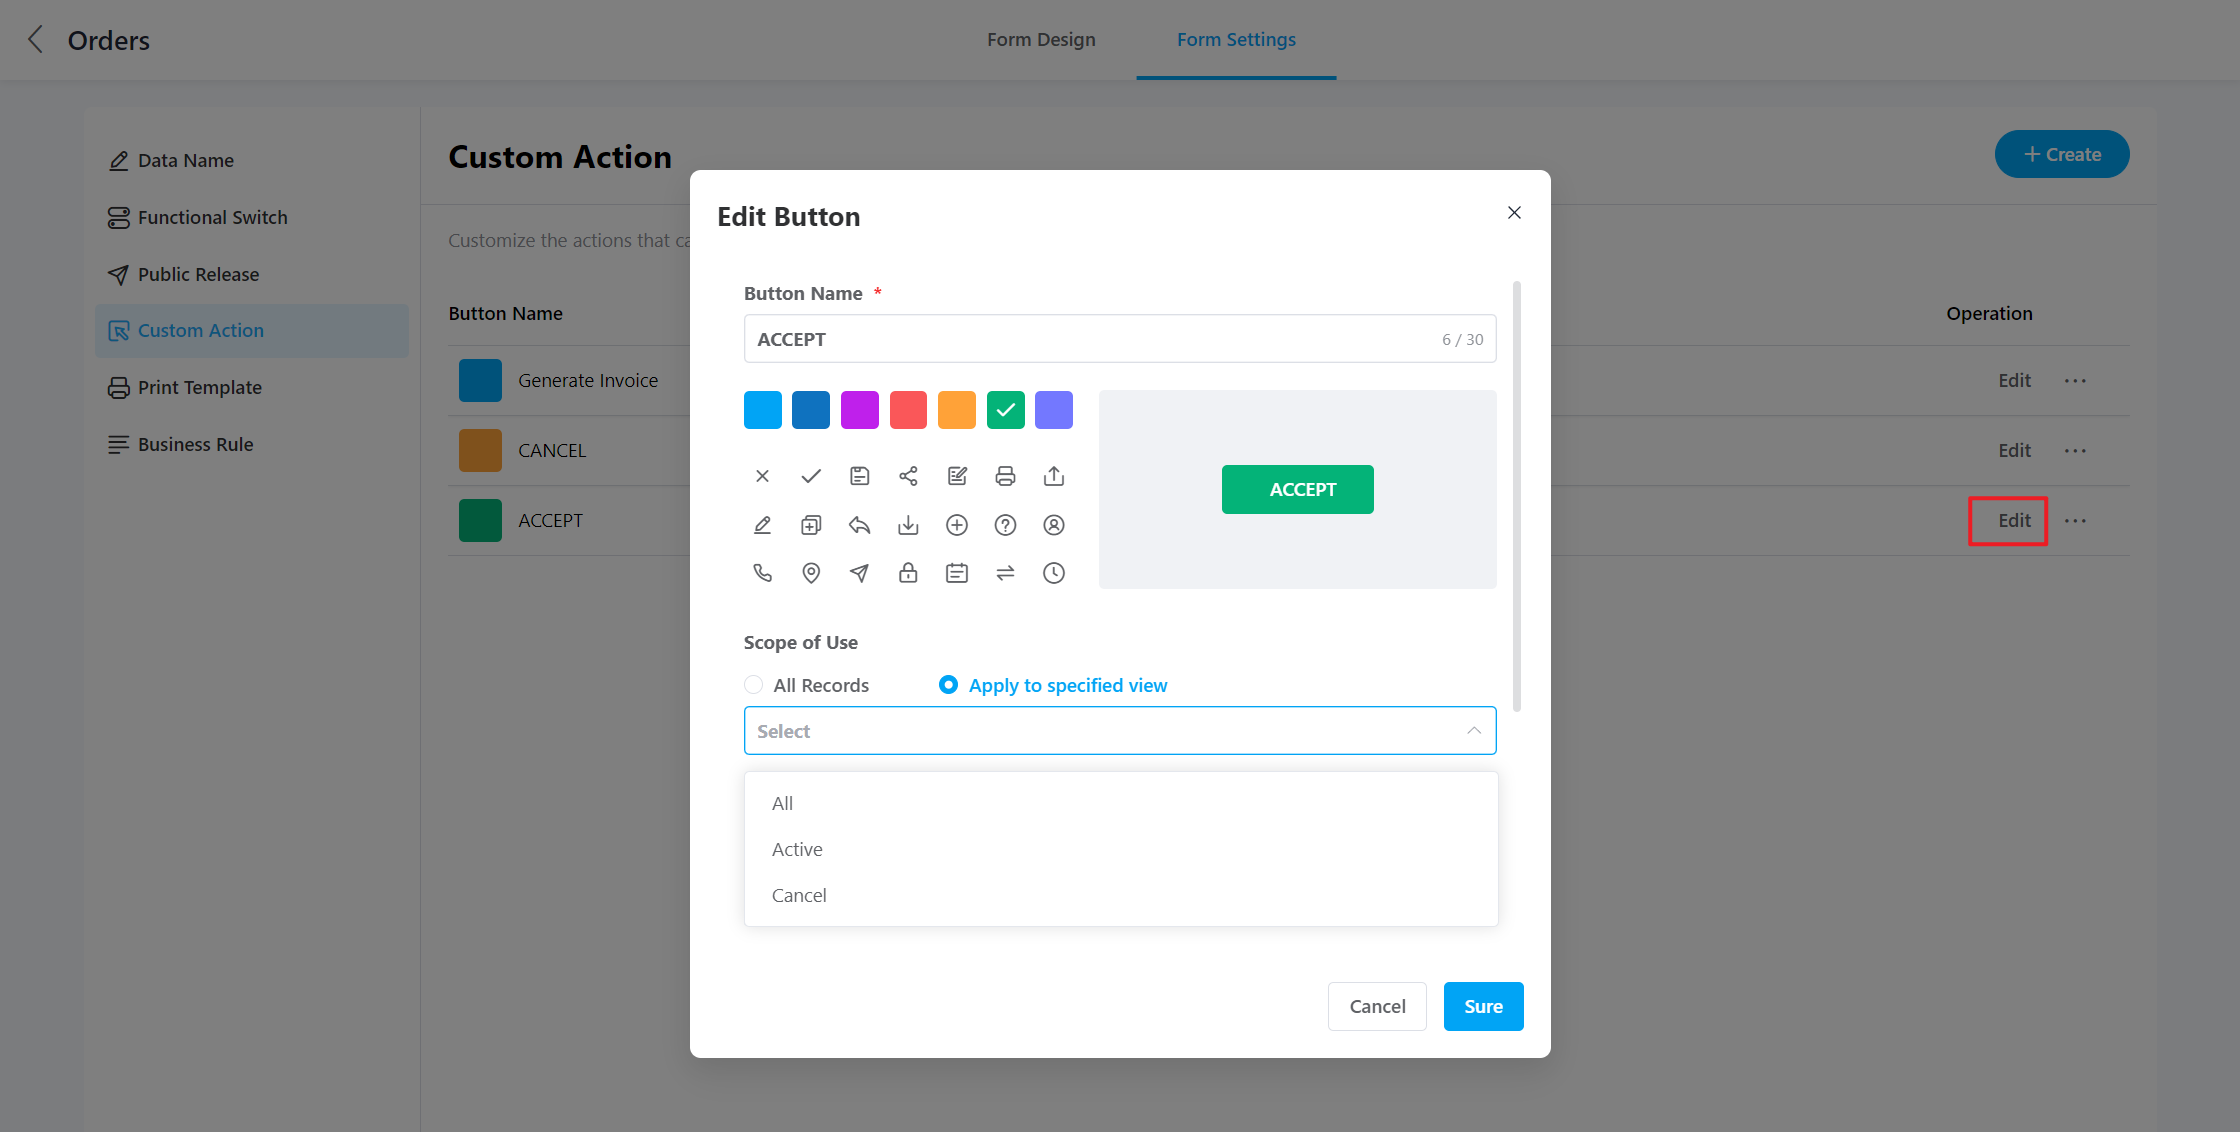
2.2.1 Setting Button Name
Limited to 30 characters, it is recommended to use concise and impactful wording.
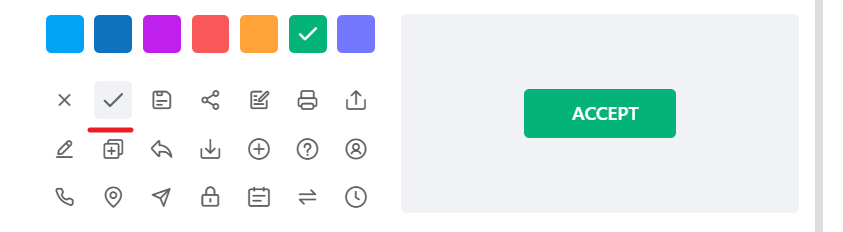
2.2.2 Setting Button Icon and Color
You can choose a suitable icon and color for the button if you like.

How to Deselect an Icon:
Click on the selected icon again to cancel it.
2.2.3 Scope of Use
The button can be applied to All Records or Records in a Specific View.
Snipaste_2023-06-19_17-43-30.png2.2.4 Enabling the Button
- Always: The button is always clickable and usable.
- Satisfy Filter Conditions: You can set one or more field filter conditions. The button will only be clickable if the record meets the conditions; otherwise, the button will be grayed out and not clickable.
2.2.5 Action on Click
This refers to what action is performed after clicking the button:
1)Execute Immediately
Clicking the button immediately triggers the workflow and refreshes the current record.
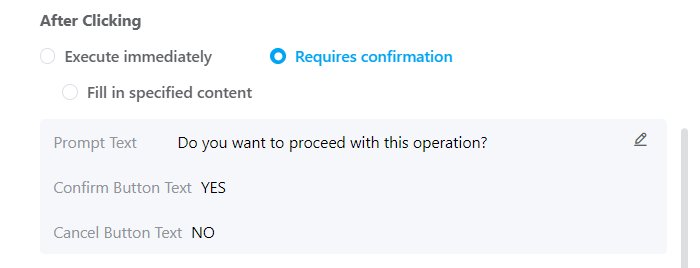
2)Requires Confirmation
Clicking the button prompts a confirmation window for the operator to confirm whether to execute the workflow. The content in the window can be edited.
3)Fill in Specified Content
Clicking the button pops up a window for the operator to fill in specific field contents. After filling in the content, clicking "Confirm" will create the workflow.
The fill-in content can achieve the following five effects:
● Fill in the designated field in the current record, which can be set as fillable, read-only, or required.
● Support filling in default values.
● Create a new related record in the current record.
● Fill in the content of specific associated fields.
● Create a new related record for the current related record.
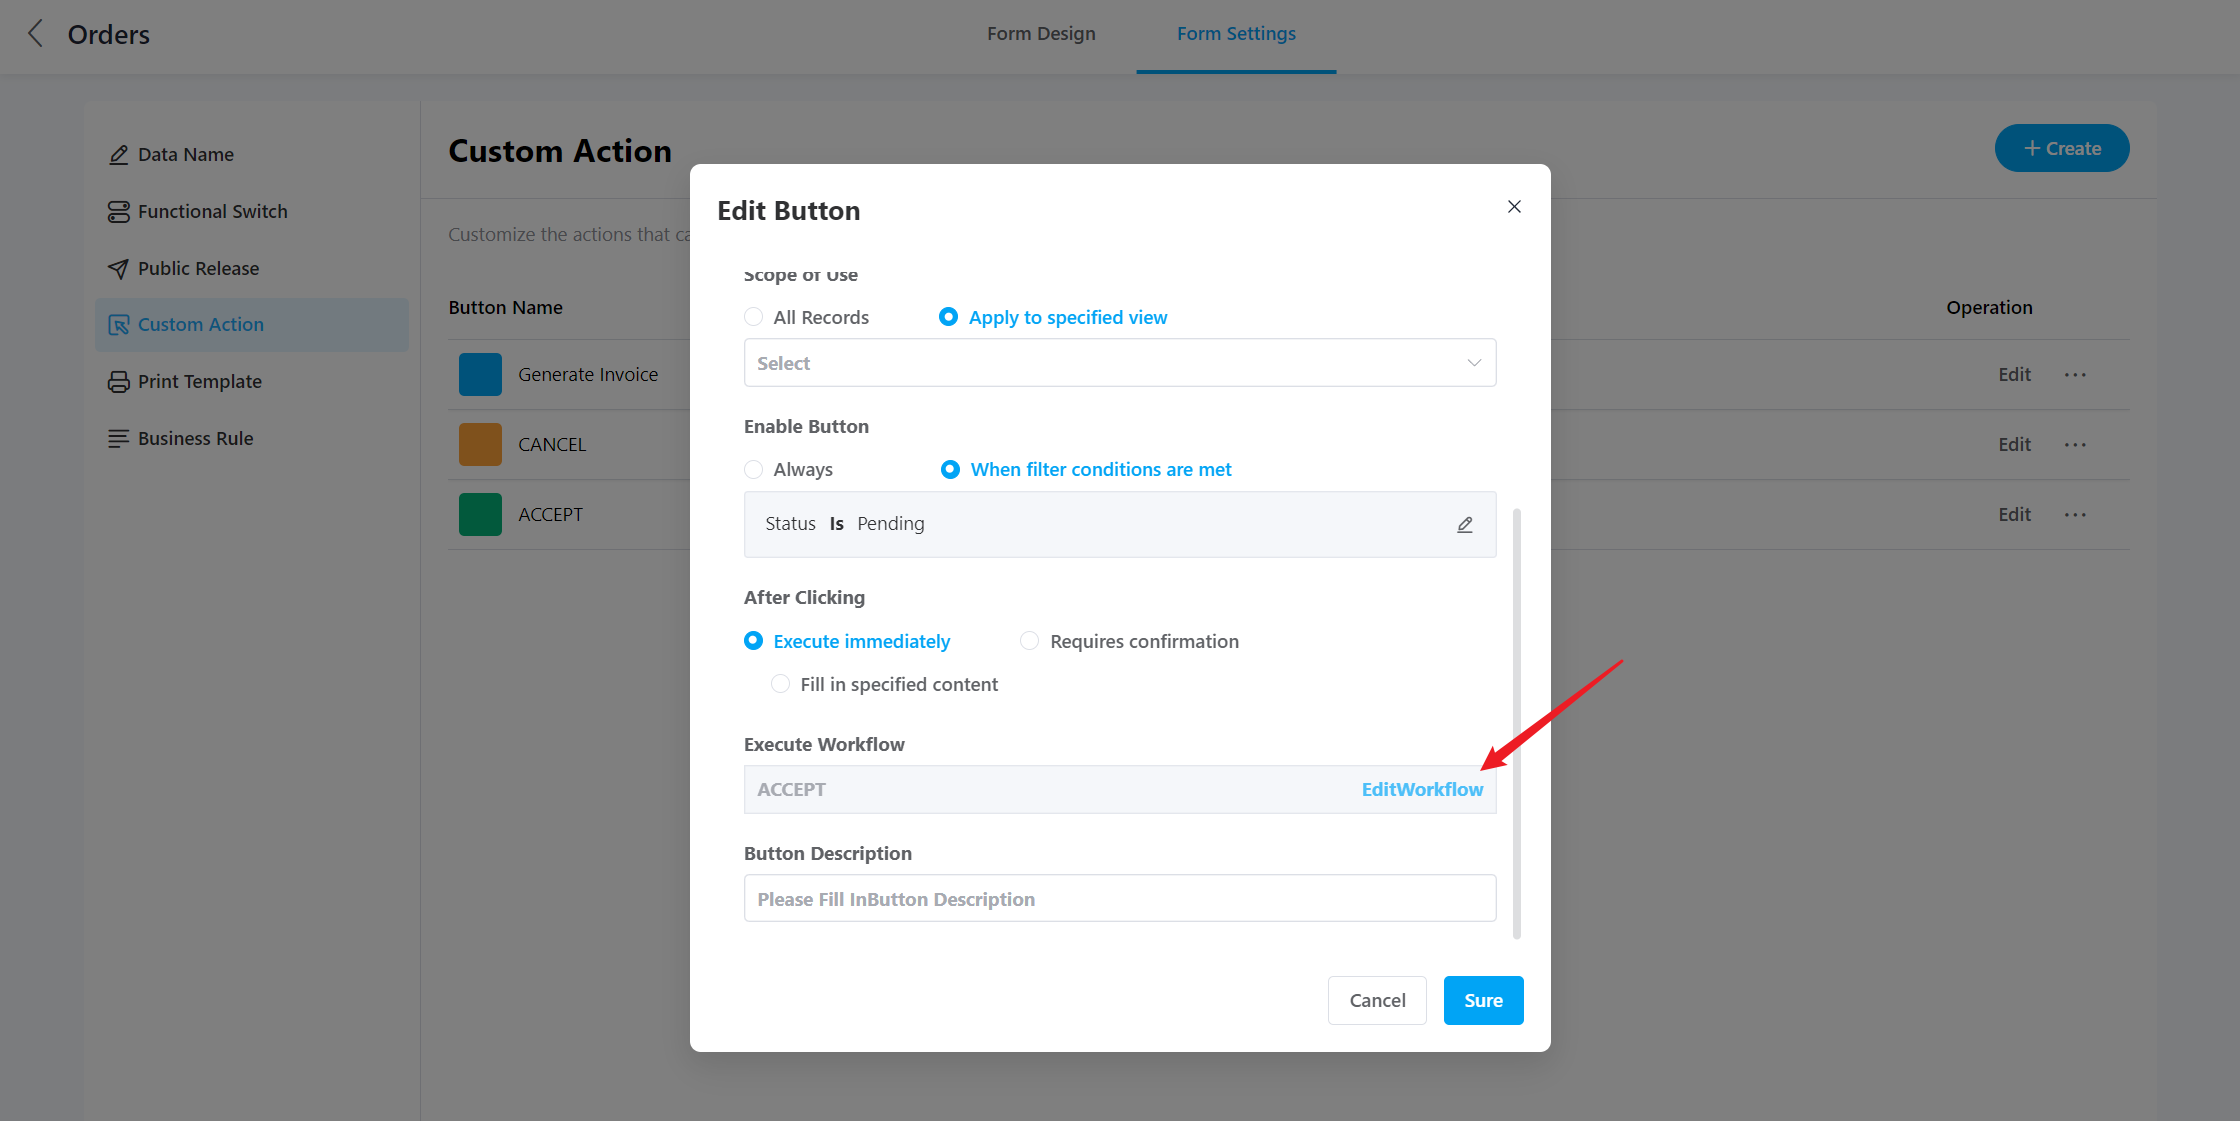
2.2.6 Execute Workflow
Each button is associated with a workflow (one button corresponds to one workflow), and the workflow and the button are bound. If the workflow is set to "Disabled" in the workflow management, the button will become inactive but not disappear. Deleting the button will also delete the associated workflow.
2.2.7 Adding Button Description
Add a description to the button to help the operator understand the fill-in content better.
- Configuring and Publishing Workflows
Each button generates a corresponding workflow, which can be set to "Disabled" in the workflow management but will still exist. If a button is deleted, the associated workflow will also be deleted.
4. Using and Managing Buttons
4.1 Modifying and Deleting Buttons
The location in the form settings is as shown in the following image:
4.2 Usage Scope of Buttons
Click "Edit" to enter the button details page, where you can modify the usage scope of the button:
- All Records: Applicable to all records within the worksheet (all views).
- Applicable to Specific View: Only applicable to records in the specified view.
Snipaste_2023-06-19_18-17-24.png4.3 Configuring or Deleting Button Workflows
4.3.1 Reconfiguring Button Workflows
There are two ways to access the workflows:
- Through the button: Click "Edit Workflow" to reconfigure the button.
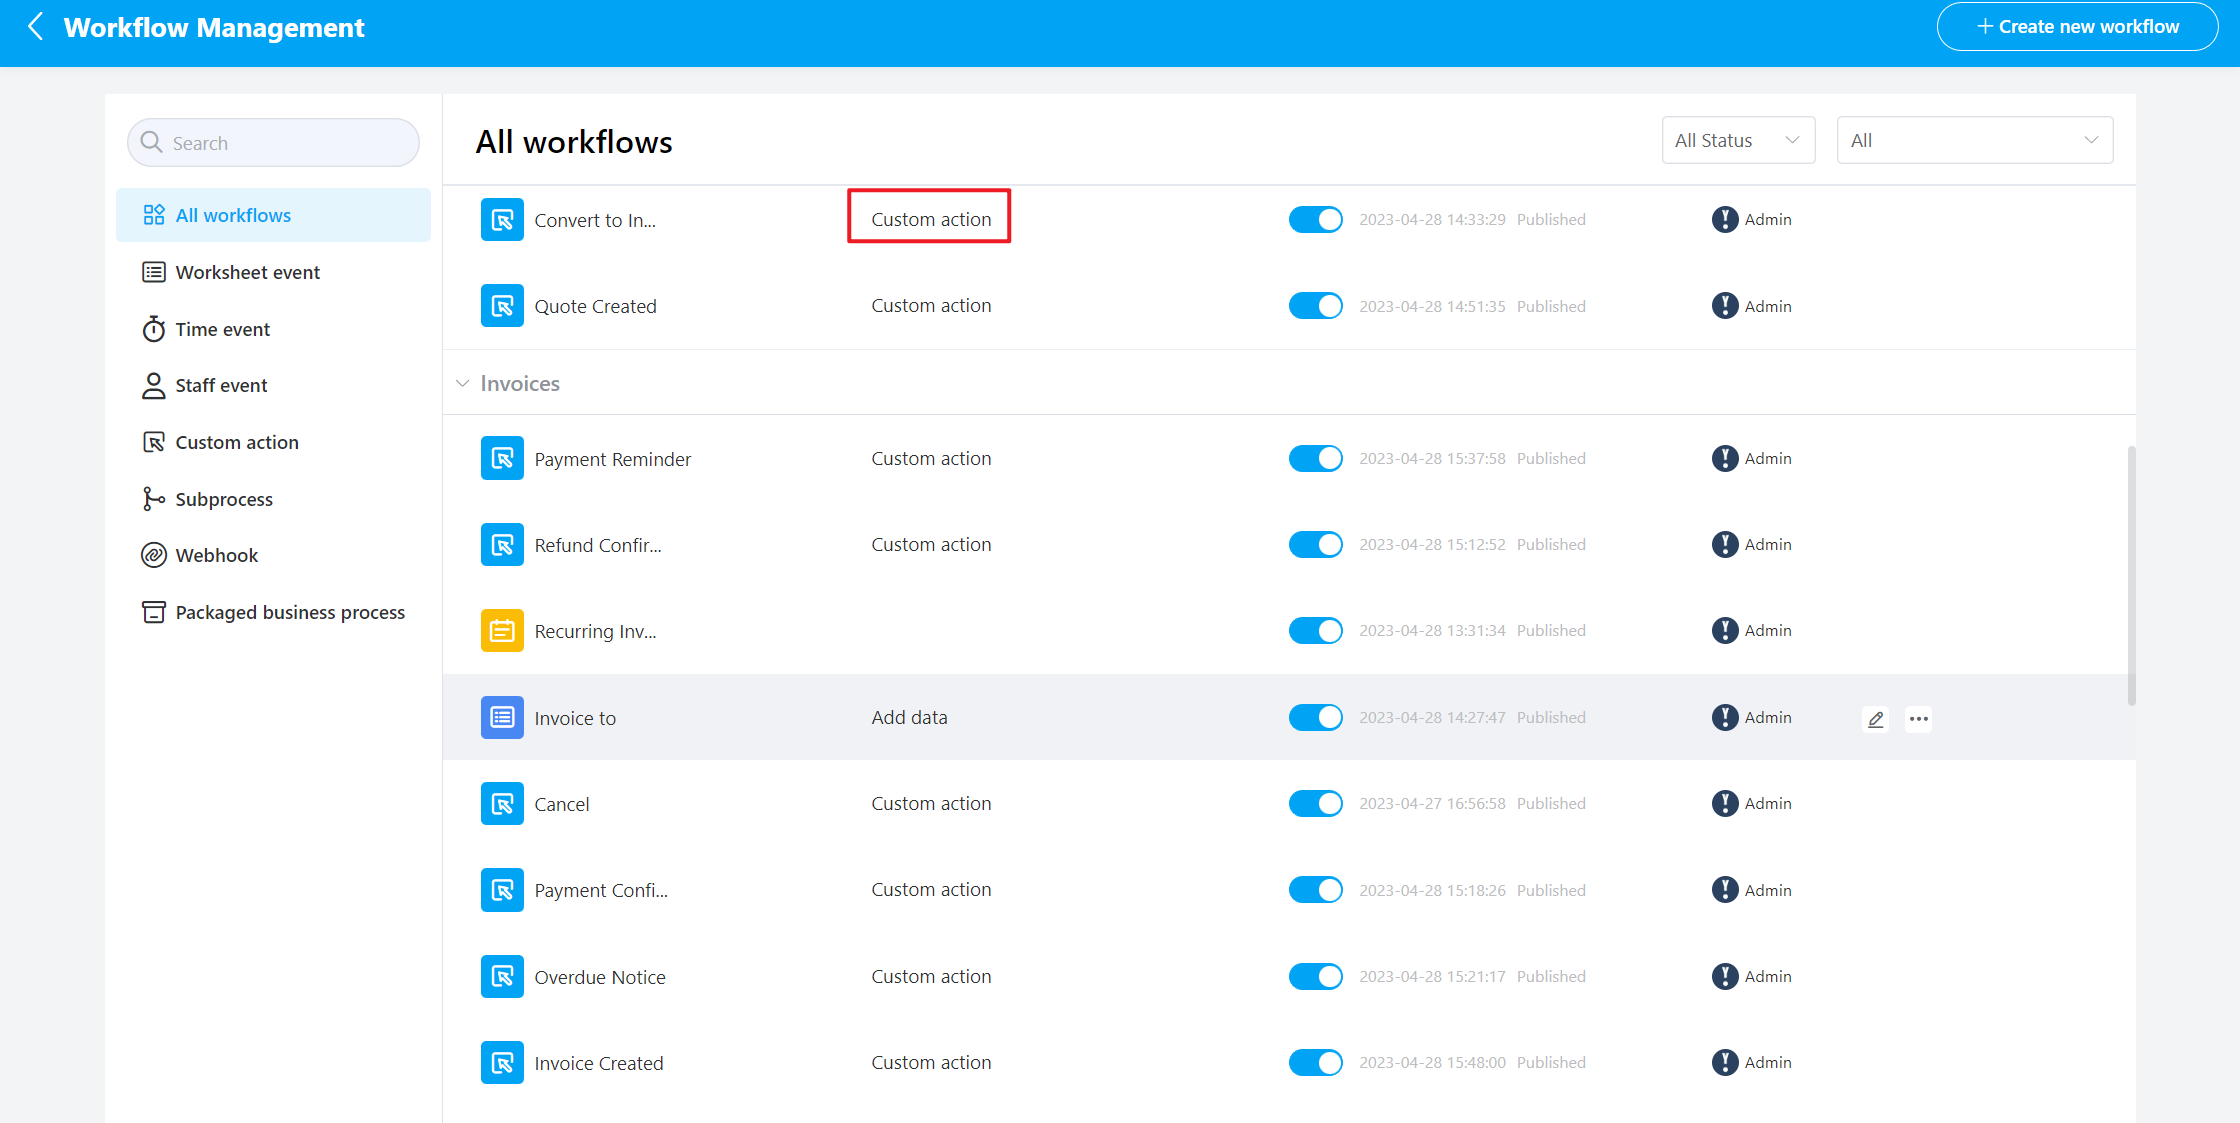
- Through the Workflow Management module: Click the button name to reconfigure the button.
4.3.2 Deleting Button's Associated Workflow
- To delete a custom action workflow, delete the button in the form or view settings.
- Only when the button is wholly deleted will the associated workflow be deleted.
4.4 Hiding Buttons
- Configure the usage scope to display the button only in a specific view.
- Buttons will not be displayed when opening a record through related records.
For example, if a "Convert to Invoice" button is added in "Quotes," which is associated with an "Invoices" worksheet, opening that "Quotes" record from within the "Invoices" worksheet will not display the "Convert to Invoice" button.